Showing posts with label gluten-free. Show all posts

Monday, August 13, 2012

Yummy stuff to grill

I know this sounds really lame coming from someone who loves to cook, but I went almost two years without a grill. And this sounds extra lame, but one of the reasons I went so long without a grill is that grills scare me a little. I've always viewed them as sort of a "man thing." Perhaps it's the open flame, the big chunks of meat, or the endless commercials featuring men holding court over their grills, opening a new set of tongs for father's day, or donning a cheesy apron that says "Grill on grill action."

Anyway, I decided that if I'm going to call myself a decent cook, I had to get over my grill issues. So, a short trip to Home Depot and a few hundred bucks later, we became the proud owners of a new grill. It's nothing fancy--just a regular old gas grill.
But this time, I refuse to shy away from it.

So here are three recipes I've made on the grill over the last few months. They are all awesome and highly recommended by me and the people I've fed. One thing that all of these recipes have in common is big, bold flavor. I know that the act of grilling itself imparts a delicious charcoal flavor to food, but if you're a fan of slightly spicy, power-packed flavors, these recipes are for you.

1) Chile-Rubbed Grilled Chicken with Salsa

A lot of grill aficionados say to avoid grilling boneless, skinless chicken breast, as it can be dry and rubbery. I made this recipe three times, and not once was it dry or rubbery. The key is to use the freshest, highest quality chicken you can find, and to be careful not to overcook it.

*A note: When I first made this dish, I didn't read carefully and I ended up using all 4 teaspoons of lime juice in the rub (you were supposed to use 1 tsp and save the rest for the salsa...whoops). BUT, it turned out awesome! It made the rub a little more moist and kind of paste-like, so it adhered to the chicken better. Consequently, I recommend making the same mistake I did. I also OD'ed a little bit on the chipotle powder, which I also recommend if you like things spicy.

2) Grilled Pork Tenderloin with Corn on the Cob (aka Grilled Pork Tenderloin with "Vomit Sauce")

Yes, I am aware that including the word "vomit" in a recipe is really disgusting and probably the least appetizing thing one can do. But what can I say? It was a nickname that stuck. Here's the thing...the sauce that accompanies the pork in this recipe (which includes apple cider vinegar, ketchup, brown sugar, and red pepper flakes) smells really terrible while it's cooking. It really does smell like, well, vomit. It got so bad that my husband made me set the pot outside until it was time to eat.

But when you serve it alongside the spice-crusted pork? Pure deliciousness! I did tweak it a bit though. When I followed the recipe for the sauce exactly, it was a little too vinegary. So I added some more sweetness (a little extra brown sugar, as well as some maple syrup), and a little more heat (some hot sauce).

Oh, and I didn't make the corn part of the recipe, so I can't vouch for that. But the pork and sauce was definitely a keeper. I just hope my kids don't go to school and tell their teacher they have vomit sauce for dinner sometimes.

3) Chipotle-Mango Barbecue Chicken with Cilantro Chimichurri

This dish is definitely a labor of love. It requires peeling mangos (which I find to be a huge pain) and using a food processor or blender two separate times--once for the chipotle-mango sauce and once for the chimichurri. Therefore, I recommend making this for a special occasion or weekend BBQ, not a Tuesday night dinner. The leftovers heat up well, though, so you could make a bunch and have it twice in one week.

Also, although I didn't do it myself, I am sure either or both sauces would be excellent used in a different dish - perhaps with shrimp or another seafood.


Monday, March 19, 2012

Best crock pot recipe ever (brined pork chops)

It's been a while since I've made a blog-worthy meal, and it's also been a while since I've made anything worth mentioning in a crock pot. I have a bit of a love/hate relationship with crock pot meals. Obviously the idea of throwing a bunch of stuff into a pot in the morning, and having a delicious meal all ready and waiting at dinner time is a wonderful one... But usually all of the crock pot recipes I make turn out to be riffs on mushy meat stew in some sort of a tomato-based sauce.

I was excited when I saw this recipe for Alton Brown's slow cooked pork chops featured as the "Recipe of the Day" on the Food Network website. For one, I'd been making so much chicken lately that my whole family was really chickening out (Sorry, I heart cheesy puns). Secondly, it was something unique, unlike typical crock pot fare.

This recipe was super flavorful, and really tender. Pork chops can tend to be dry and flavorless, and these were just the opposite.

I do have to warn you, this dish is pretty labor intensive, as crock pot dishes go. First you have to brine the pork chops overnight (not a big deal, but it takes some advance planning). Secondly, you have to spend probably 30-45 minutes the next morning browning the pork chops before they go into the crock pot. So if you're looking for something where you can just dump some stuff into the crock pot and turn it on, this recipe isn't for you. But if you're looking to make a delicious, guest-worthy meal that you can prepare well ahead of dinner time, then you need to try this.

Note: Make sure you buy fairly thick, bone-in pork chops for this dish. And go ahead and make more than you think you'll need...the leftovers are fabulous too.

Another note: Some of the reviews on the Food Network website mention that the dish is too salty/peppery, but I disagree. I made it exactly as directed and thought the flavor was spot-on. Then again, I do love me some salt. If you're not a big salt fan, you can tone it down by using water or some wine in place of the chicken broth at the end.

Slow Cooker Pepper Pork Chops (from Alton Brown via www.foodnetwork.com)

Ingredients:

2 cups vegetable broth
1/2 cup kosher salt
1/2 cup light brown sugar
2 tbsp black peppercorns, slightly crushed
1 lb ice
4 , 1 to 1 1/2 inch thick pork chops, bone in
2 tsp kosher salt
3 oz dried apple slices
2 tbsp olive oil
1 large onion, julienned
1 1/2 cups chicken broth (and perhaps a smidge of white wine)
1 tbsp black pepper
1 tsp dried thyme

Directions:

Combine the broth, salt, brown sugar, and peppercorns in a medium sauce pan over medium high heat. Cook until the salt and sugar dissolve, and remove from heat and add the ice. Place the pork chops into a large ziplock bag and pour the mixture inside. Seal and refrigerate overnight.

In the morning...remove the chops from the brine, rinse and pat dry. Season on both sides with kosher salt and set aside.

Place the apples in the slow cooker. Heat 1 1/2 tsp of the olive oil in a large saute pan. Over medium high heat, sear both sides of the pork chops until golden brown, about 5-6 minutes per side. Once browned, put the chops into the crock pot atop the apples.

Add the remaining olive oil to the pan and saute the onions until soft and beginning to brown. Add the chicken broth to the pan to deglaze. (I used a little bit of white wine to deglaze, and then added the chicken broth). Add the black pepper and thyme. Transfer to the slow cooker. Set to high for 1 1/2 hours, and then turn to low. Continue cooking another 4-5 hours or until the pork is tender and falling away from the bone.

*If you're not going to be home to turn down the crock pot, just set it to low the whole time.

These chops would go great with just about any side dish you can think of. The sauce would be great to soak up with some rice, roasted potatoes, cauliflower, etc.


Wednesday, February 29, 2012

30 minute meal (for real): Sausage with white beans and kale

I recently read an article about how the abundance of cooking shows and "food tv" does both good and bad things to the morale of the home cook. On one hand, the 'round the clock cooking shows often provide great recipes and solid instruction. On the other hand, it often makes us feel insecure if we can't come up with an inspired, expertly executed dish with a handful of ingredients and a ticking clock (ie: the Iron Chef).

One such show that's often encouraged, yet discouraged me, is 30 Minute Meals with Rachel Ray. Rachel's mantra is that anyone can throw together an amazing, multi-course meal (sometimes even with homemade dessert!) in 30 minutes. The problem is that those 30 minutes don't account for all of the pre-rinsing/chopping/measuring that goes into her recipes, nor the fact that she has more ovens and kitchen gadgets than most home cooks. Perhaps most importantly, it ignores the major clean-up that has to occur when one uses multiple pots, pans, and utensils to make that cute little 30 minute meal.

That's why I love this new recipe that I recently made. It was something that I really did throw together in its entirety in under 30 minutes. It's hearty, healthy, and contains only a handful of ingredients. And the whole thing only requires one pan. I know...kale seems kind of scary to the vegetable-averse, and it really took me a long time (I'm talking years) to work up the courage to cook with it. But I promise you it's good in this recipe. My kids even ate it. Here you go...

Sausage with Kale and White Beans

Ingredients:

2-3 large links of quality lean sausage (I usually use chicken basil sausage made at our grocery store)
1 large bunch of kale
2 cans of white beans (cannellini or navy beans)
chicken stock
1 clove of garlic, chopped (optional)
white wine (optional)
lemon (optional)
salt

Directions:

Saute the sausage in a large saute pan or stock pot until nicely browned and cooked through. Remove to a cutting board and slice on the diagonal into 1/2 inch slices.

Separate the kale from the stem and roughly chop into bite-size pieces. Return the pan that the sausage was cooked in to the stove and set at medium-low. Pour in a little bit of stock or white wine, stirring and scraping with a wooden spoon until the browned bits come up from the bottom. Add the kale leaves to the pan and cook, stirring occasionally, until it begins to wilt. Add the beans, some chopped garlic, and enough stock to make it slightly soupy without actually being soup. Continue cooking until the beans and kale are soft. Add some salt to taste. If you want to boost the flavor a bit, you can also squeeze in a little lemon juice and/or add a splash of white wine.

Add the sausage slices back into the pan until everything is warmed through. Serve in a bowl with, of course, some crusty bread.

Tuesday, January 31, 2012

Cajun turkey burgers and sweet potato "chips"

My friend Meredith recently shared a recipe that she absolutely loved: Sandra Lee's recipe for cajun turkey burgers. It took me a while to make it, but I finally got around to it this past weekend. Now I wish I hadn't waited so long! I love that it contains pureed vegetables; and when you top it with some red onion, lettuce, avocado, and the sauce containing chopped tomatoes, it tastes really fresh and healthy, while still feeling like a treat.

The burgers are moist, flavorful, and have just enough kick without being overly spicy. The true test was that I enjoyed the burger without a bun since I am currently experimenting with a gluten free diet. I've always thought a bunless burger sounded about as appetizing as a pickled pig's foot, but because this one was so tasty and not at all fatty, I truly didn't miss the bun. (For those who know my affinity for crusty bread, this is a bold statement.)

Note: If you google Sandra Lee "cajun turkey burger" recipe, you will find two versions: one is on the Food Network website, and one is on her own personal website. The recipe I used was from her website. I've reproduced it below, with some minor adjustments.

Sandra Lee's Cajun Turkey Burgers

*This makes about four generously sized burgers, so double if you want more.

Ingredients:

2 tbsp thinly sliced scallions
3 tbsp celery, coarsely chopped
1/2 cup roasted red peppers
2 tbsp chopped fresh parsley
1 tbsp cajun seasoning
1 1/4 lbs ground turkey
2 tbsp plus 1/2 cup tartar sauce
1/4 cup plain bread crumbs (I used corn flake crumbs to avoid gluten)
1 large egg, beaten
salt & pepper
hot sauce (optional)
1 roma tomato, diced
1 teaspoon finely minced or mashed garlic (the original recipe calls for Gourmet Garden's garlic blend, but if you can't find it or don't feel like buying it, just mash up some fresh garlic)
lettuce, red onion, and/or avocado for topping

Directions:

1. In a food processor (I used a magic bullet...a blender would also suffice), combine the scallions, celery, red peppers, parsley, and Cajun seasoning. Cover and process until smooth. Transfer mixture to a large bowl. Add turkey, 3 tbsp tartar sauce, bread crumbs, and egg, and mix well. Season with salt, pepper, and hot sauce. Shape mixture into four equal size patties.

2. Preheat broiler. Place patties on a foil-lined baking sheet or broiler pan. Broil 6 to 8 inches from the heat for 5 to 7 minutes on each side, until internal temperature reaches 165 degrees. (*Or you can just cut into it to make sure it's done)

3) In a small bowl, stir together remaining 1/2 cup tartar sauce, diced tomato, and garlic. Serve burgers on a toasted bun with lettuce, onion, and tartar sauce mixture (perhaps some avocado as well).

And now for my side dish....


I call this "Sweet potatoes for people who hate sweet potatoes." It was born out of my theory that almost any vegetable will taste good if it is slice thinly enough. To make these potato "chips," simply peel and thinly slice a sweet potato. If you have a mandoline, that would be the best way to ensure evenly sliced potatoes; but a steady hand and a good knife will do the trick as well.

Put the potato slices into a bowl and drizzle with olive oil, salt, and pepper. Toss until the potatoes are evenly coated. Arrange on a baking sheet and bake at 350 until they are cooked through and tender. FYI: unless you slice them super thin, they won't really take on a crispy chip texture - it will be more like a soft, slightly chewy chip.


Thursday, November 24, 2011

A home cook tackles chef Jonathan Waxman's famous roast chicken & salsa verde...and wins!!!

A recent issue of Food and Wine Magazine featured some of our country's most famous chefs and their signature dishes. The one that immediately caught my eye was Jonathan Waxman's Roast Chicken with Salsa Verde (aka: pollo al forno), which is a staple at his NYC restaurant, Barbuto. The main thing I liked about it was its simplicity. The actual chicken requires no marinating or complicated sauces...you basically just cut it up, stick it in a pan, and stick it in the oven. The second thing I loved was the salsa verde. Having eaten at one too many Tex-Mex restaurants, when I think of "salsa verde," I immediately think of a concoction of tomatillos, cilantro, onion, and green chiles. So I was surprised to see Waxman's Italian salsa verde, which is a mixture of fresh herbs, capers, arugula, garlic, lemon juice, and some other yummy stuff.

What daunted me most about the recipe was the idea of cooking a whole chicken. Now I've cooked plenty of chicken in my life, but only one part at a time: breasts, legs or thighs...all pre-cut, nicely arranged in pretty little rows inside a neatly wrapped package. But a whole chicken? With all its weird innards, bones, and ligaments? It scares me.

What gave me the courage to try it was this youtube video I found of Jonathan Waxman himself cooking the aforementioned chicken. As soon as I watched the video, I couldn't NOT cook the chicken. Watch it yourself and tell me you don't feel the same way.

Everything about the video--the music, the fresh herbs strewn on the cutting board, the flickering flame inside the oven, Waxman's laid back "anyone can do this" vibe--inspired me. Again, I challenge anyone to watch that video and NOT want to make that chicken. So I went to the store, bought the freshest whole chicken I could find, and set to work.

If someone had been in my kitchen, the video of me trying to prep the chicken might have become a youtube sensation of its own. See, the part where Jonny (I feel like I can call him that since I've made his chicken) takes his scissors and neatly cuts through the chicken's back like he's cutting a piece of tissue paper? Well when I did that, it looked like I was trying to chop down a tree with a pair of pruning shears. And that part where Jonny takes his hands and, with one slight shove, cracks the chicken's spine in two? Well I literally had to climb on top of the chicken, mount it, and bounce up and down until I got it to crack. But the point is, I DID it. It wasn't as pretty, but I guarantee the end result was just as tasty.

As for the salsa verde, it's pretty foolproof. If you don't have the same herbs he recommends (parsley, mint, tarragon, and rosemary), you can substitute or omit at will. In fact, the printed version of his recipe apparently uses different herbs than he does in the video. You can find the print version here. I used basil instead of mint, and it turned out awesome. I don't think you can go wrong. Since he didn't give measurements in the video, I just eyeballed the amount he used and aimed for the same amount.


After talking this dish up so much (I texted my husband something along the lines of: "BTW, when you get home tonight, you will be transported to Manhattan's West Village, where you will eat the signature dish of a Top Chef Master. It's a $19 dish!"), I was a little nervous about actually serving it. But it totally lived up to the hype. It's a simple dish, yet it tastes totally upscale. It's comfort food, yet its healthy. It's something the whole family will enjoy eating. And the leftovers can be made into an excellent soup (but that's another whole post...one I'll hopefully get to one of these days). 

The bottom line is: watch the video, make the chicken. You won't regret it! 

Friday, November 4, 2011

Buffalo Chicken Salad (aka: How to satisfy your chicken wing craving without guilt)

A few weeks ago I was sitting on the couch while my girls were taking a nap, wondering whether I could come up with a buffalo chicken recipe that would actually be healthy. See, I love me some really crispy, spicy chicken wings, but the main reason I crave them is the buffalo sauce. And buffalo sauce itself isn't unhealthy--it's just some vinegar and chili peppers. It only becomes unhealthy when you combine it with tons of butter, a deep fryer, ranch dressing, or mounds of cheese (as in my favorite recipe for buffalo chicken dip).

As I was sitting there pondering potential recipe ideas, I heard a voice say: "Buffalo chicken salad." God? I thought, looking upward. Then I realized that the voice belonged to Ellie Krieger, who was speaking to me from the TV. Well she wasn't actually speaking to ME, but it felt that way. It was as if she'd read my mind.

Ellie is known for putting healthy spins on traditionally unhealthy dishes, so I was excited to see what she whipped up. The trick to her salad was to make her own blue cheese dressing, which uses fat free yogurt as a base in place of tons of mayonnaise. She also used plain chicken breasts doused in buffalo sauce and broiled in the oven.

I made the recipe ASAP, and it turned out great! Here is a link to the recipe on the Food Network site.

A few things I did differently:

1) Instead of spending money on buttermilk for one recipe, I created my own using vinegar and milk. To do this, just place 1 tbsp of white vinegar in a 1-cup measuring cup. Fill the cup to the top with milk. Let stand for 5 minutes: Voila! You've got buttermilk!

2) To boost the flavor of the dressing, I added about half a packet of dry ranch dressing mix in place of the sugar.

3) Instead of using just romaine hearts, I used a mix of romaine hearts and a darker leafier green (to boost the nutrients)

Also, unless you're partial to a certain buffalo sauce, I definitely recommend using Frank's Red Hot. It has great flavor that can't be beat (in my humble opinion). This is a recipe I will be making again and again. It's great for a light weeknight dinner or for entertaining. Your guests will love you when you tell them that it's guilt free.

Wednesday, August 10, 2011

The best smell in the world


Is there anything better than walking into a house and smelling something delicious cooking? It may sound a little June Cleaver-y, but I feel all warm and fuzzy inside when my husband, my girls, or a guest walks into my kitchen and says "Something smells great in here!"

Plenty of foods can inspire that sentiment...cookies in the oven...pasta sauce bubbling on the stove. But of all of the food scents out there, nothing does it for me like the smell of garlic, olive oil, and white wine simmering together. It transports me to my happy place, where I'm sitting on a lovely deck overlooking Napa Valley vineyards, a cool glass of chardonnay in hand, reading a cooking magazine while soft jazz plays in the background.

Any time I see a recipe that involves simmering garlic in white wine, I know it's going to be a winner. And when you throw in some shrimp, tomatoes, lemon zest, and fresh parsley, it would be pretty impossible to go wrong.

This recipe was largely inspired by Ina Garten's "Roasted shrimp with feta," but since I omitted quite a few things, and adjusted the presentation, I thought I'd rewrite my version of the recipe here. I went for a simpler approach, eliminating things like Pernod (who has Pernod on hand?) and fennel, and forgoing the breadcrumb topping in favor of serving the dish alongside my favorite thing in the world: crusty bread.

"Roasted shrimp with feta" (or, as I like to call it: "Roasted shrimp in garlic, tomato and white wine broth") Recipe semi-stolen from Ina Garten.

Ingredients:

Several tbsps of good olive oil
3 cloves of garlic, minced
1/4 cup dry white wine
1 can diced tomatoes (or use fresh)
2 tsp tomato paste
1 tsp dried oregano
1 tsp salt
1/2 tsp freshly ground pepper
1 1/2 lbs shrimp (peeled and deveined, with tails on)
5 ounces feta cheese, crumbled
2 tbsp minced Italian parsley
2 lemons (plus the zest from one of them)

Directions:

Pre-heat the oven to 400 degrees. Heat the olive oil in a large skillet that can be safely transferred to the oven. Add the garlic and saute over medium-low heat for one minute. Add the wine and bring to a boil. Cook for 2 to 3 minutes, until the liquid is reduced. Add the tomatoes with liquid, tomato paste, and oregano. Add salt & pepper to taste. Simmer over medium-low heat for 10-15 minutes, stirring occasionally.

Arrange the shrimp, tails up, in one layer over the tomato mixture in the skillet.* Scatter the feta evenly on top. In a small bowl, combine the lemon zest and parsley with 2 tbsp of olive oil. Sprinkle over the shrimp. Bake for 15 minutes, until the shrimp are opaque and tender. Remove from oven and sprinkle the juice of one lemon on top.

*I have to admit that I struggled with the whole "arranging the shrimp artfully" thing. My shrimp didn't really stand up in the pan...they kind of just fell over on top of one another. So when I removed the dish from the oven, I ended up dumping everything into a big bowl and serving it like that. I actually think it came out kind of better that way, since we could just dish the shrimp and tomato mixture into individual bowls, and then sop up the juices with that crusty bread I was talking about earlier.

Next time I make this, I might leave out the oven altogether, and just saute the shrimp right in the pan. I think the only real reason to bake it was to brown the breadcrumbs, but since the breadcrumbs are excluded in my version, the oven is probably unnecessary.

No matter how you end up cooking the shrimp, you can't really go wrong with this recipe. It's great for  entertaining, and--like so many of my favorite recipes--it can work as either an appetizer or a light dinner. It could also be served over pasta if you're looking for a heftier meal. And it would work perfectly fine without the feta, if you don't feel like buying it, or want to go dairy-free.

Tuesday, July 19, 2011

Chicken and white bean chili

My poor mom...her cooking has taken a lot of ribbing over the years. It wasn't that she was incompetent in the kitchen, just that she sometimes had a knack for picking recipes that were born to be failures (mini franks simmered in grape jelly, for example), or making the same things over and over until we begged for mercy (like the 3-month chicken finger fest that occurred sometime during 1996).

Like a fine wine, however, her cooking has gotten much better with age. And the other night she made a yummy and very blog-worthy chicken chili recipe, which she had clipped from the pages of the local PA newspaper. Everyone at the table declared it "really good." I think the word "delicious" might have even been thrown around.

The nice thing about this chili is that you can adjust the seasonings to suit your heat tolerance; if you aren't into spicy foods or want to make it kid-friendly, then eliminate the cayenne. If you want to spice it up, you can throw in some diced jalapenos, add more cayenne and cumin, and use pepper jack cheese instead of regular Monterey Jack.

Here's the recipe: (adapted from the Harrisburg Patriot News)

Chicken and white bean chili

2 (20 oz) cans cannellini beans (sometimes known as white kidney beans)
1 tbsp olive oil
1 1/2 pounds chicken, diced into small cubes
1/4 cup chopped onion
1 14 oz can chicken broth
1 4 oz can green chiles, chopped
1 tsp garlic powder
1 tsp cumin
1/2 tsp oregano
1/2 tsp chopped cilantro
1/8 tsp cayenne
2 green onions, sliced
monterey jack cheese, shredded

Drain one can cannellini beans and set aside, but save the liquid.

Heat oil in pan over medium heat. Add chicken and onion and cook for 4 or 5 minutes. Stir in broth, green chiles, and spices. Simmer 15 minutes.

Stir in the drained beans and the can of undrained beans. Simmer 5 minutes (If you want, you can mash some beans to help thicken the chili.)**

Ladle into bowls, garnish with green onion and cheese

**Note: We also ended up adding some cornstarch to thicken the chili at the end.

Thanks, mom! I promise not to tease you about your cooking anymore...at least not for a while. :)

Tuesday, June 21, 2011

Shrimp and avocado tostadas & pulled pork tacos with fennel slaw


I have quite a few strengths as a cook, but timing is not one of them. I am at my best when I am making a dish that I can ease into, adjusting seasonings as I go, hovering and poking to test doneness. Or I enjoy things that I can make ahead and either serve cold, room temperature or reheated.

Meals that need to be carefully orchestrated, with several components being finished at exactly the same time, really stress me out. Take, for example, my husband's father's day request: surf and turf. There's nothing spectacularly difficult about this dish...no fancy ingredients or complex preparations. But the simple fact that I had to serve a perfectly cooked filet, perfectly cooked lobster tail, roasted potatoes, and broccoli, all steaming hot, ALL AT THE SAME TIME... Well, it gave me an anxiety attack. Yet, I managed to pull it off:


Anyway, the point of this post wasn't to brag about my surf and turf (although my husband did say it was delicious), it was to talk about the type of dish I prefer to make. The first is Shrimp and Avocado Tostadas. This dish makes a perfect appetizer, lunch, or light dinner. It's served cold or room temperature which means it's great to make ahead or to serve on a hot summer night. Here's how to make it:

Shrimp and Avocado Tostadas

Ingredients:

1 lb shrimp, cooked, peeled, deveined, and chopped
1 or 2 limes
1 or 2 ripe avocados, chopped
a few handfuls of grape tomatoes or small cherry tomatoes, halved
minced red onion
chopped cilantro
salt

Directions:

Once the shrimp have cooled, mix them in a bowl with the avocado and tomato. Squeeze in some lime juice. Add the onion, cilantro, and salt to taste. Mix together gently and serve atop crispy tortillas, or with tortilla chips. **If you want to make this a "make ahead" dish, wait to chop and add the avocado until just before you're ready to serve; otherwise it will turn brown.

The second dish I have to recommend is Melissa D'Arabian's "Pulled Pork Tacos with Fennel Slaw." This dish is definitely a bit labor-intensive, and has quite a few ingredients. But, it is a delicious recipe, and a perfect thing to make on a leisurely weekend afternoon. The pork cooks for three hours, so you can make it at lunch time, shred the pork in the late afternoon, and have it sitting on the stove ready to serve at dinner time and/or when your guests arrive. Click above for Melissa's recipe. I followed it pretty much exactly, except that I left out the sour cream and parmesan to make it dairy-free.

Sunday, June 5, 2011

Chopped brussels sprouts salad with bacon

In my quest to eat more veggies, I've come up with a simple but effective little trick: chop them up! I can enjoy eating almost anything if it is chopped up small enough and mixed with other tasty foods. So if I'm not a fan of a particular vegetable, or clueless about what to do with it, I start mincing away. Take brussels sprouts, for example. The thought of gnawing away on a big old sprout kind of makes me want to throw up. But when they are chopped up, seasoned with some lemon juice, parmesan cheese and bacon, and thrown into a salad: Deliciousness! (A while back, I posted another great chopped brussels sprouts recipe, which is a great warm alternative to this one.)

I got the inspiration for this salad from The Arrogant Butcher, a restaurant in downtown Phoenix. My friend ordered their brussels sprouts salad, and I helped myself to several forkfuls (yes, I'm rude like that). We both were surprised by how yummy it was, and I kept thinking about it for days afterward. I remembered the main flavors, and so I experimented with making one of my own. I have to admit that while my salad recipe is an original creation, the dressing is not. The one I repeatedly turn to is Lucini's "Bold Parmesan and Garlic," but I'm sure any slightly creamy, garlicky, parmesan cheesy dressing would do.

Chopped Brussels Sprouts Salad with Bacon

Ingredients:

Brussels sprouts, chopped (I use about 3-4 per person)
Bacon (I use about 1 strip per person)
Lemon
Parmesan cheese (the kind you grate yourself is the best, but any old kind will work)
Olive oil
Salt
Baby spinach, chopped
Romaine hearts, chopped
Good dressing (see photo)

Directions:

Cook the bacon until crisp (I just use the microwave method). Let cool and crumble.

Heat some olive oil in a pan and lightly saute the chopped brussels sprouts until they're slightly tender, but not super soft (you want them to still have some crunch). Squeeze in some fresh lemon juice, and add some salt and a few sprinkles of parmesan cheese.

Take the brussels sprouts off the heat and let them cool. Then toss them together with the bacon, spinach and romaine. Add dressing and top off with some more parmesan if you wish.

Wednesday, January 12, 2011

Chicken and rice with spicy tomatillo and Mexican squash sauce (and homemade guacamole)

I always get excited when something I cook turns out well, but I get particularly giddy when it's something I invented myself. It's been a while since I got experimental in the kitchen, so the other night I decided to get a little crazy with my newest batch of veggies from Bountiful Baskets.

My basket contained a mystery ingredient I'd never cooked with before. It was gray squash (also known as Mexican squash). Through a Google search, I learned that it's kind of like zucchini, but tastes better and doesn't get quite as mushy when cooked. That sounded promising.

Since it was nicknamed Mexican squash, I figured I'd use it in a Mexican-inspired meal. I had a bunch of tomatillos, some jalapenos, tomatoes, and onions, so I decided to do some chopping, roasting and pureeing to create a tangy, spicy sauce to serve over chicken and rice. It also gave me a chance to work on my new chopping techniques courtesy of the Knife Skills class I took at Sur la Table (highly recommended, by the way).

Feeling extra creative, I decided to make my own Mexican rice instead of using the boxed pre-seasoned stuff. And I also made some fresh guacamole with the avocados in my basket.

Chicken and sauce:

canola or olive oil
8 tomatillos
1-3 jalapenos (taste them to see how spicy they are before deciding how many to use)
1 small onion, chopped
2 gray/Mexican squash, chopped into smallish cubes
1 or 2 garlic cloves, chopped
2 large tomatoes, diced (or substitute canned tomato)
about 1 cup of chicken broth
salt
tomato paste
a handful of chopped cilantro
Chicken breasts, pounded thin

Peel the papery skin off of the tomatillos, and rinse them. Roast the tomatillos and jalapenos under the broiler until the skin starts to blister and turn black; flip over so both sides are roasted. Puree the roasted tomatillos and jalapenos in a blender or food processor until fairly smooth. Set aside.

Saute the diced onions, garlic and squash in some oil for several minutes, until tender. Transfer to a large sauce pan/soup pot. Add the tomatillo and jalapeno mixture to the pot. Pour in the chicken broth and add the tomatoes. Simmer for a few minutes, and add salt to taste. If it's too tangy, add some tomato paste to sweeten it a little bit. You can also add some more chicken broth if it's too thick. If it's too runny, let it simmer for a while until it reduces down.

While the sauce is simmering, heat some oil in a saute pan. Season both sides of the chicken breasts with salt and pepper. Saute, turning once, until no longer pink. Serve the chicken over the rice, and ladle the sauce on top. Guacamole can be served on the side, or mixed in with the dish.

Rice:

I followed this recipe, substituting cilantro for the parsley. I also used canned diced tomatoes instead of tomato sauce.

Guacamole:

If I have really pretty, perfectly ripe avocados, I keep the guacamole simple: mashed avocados, freshly squeezed lime juice, salt, chopped cilantro, and possibly some chopped tomatoes.

Tuesday, January 4, 2011

Herb-marinated pork tenderloin


December was a month filled with many fun things, but exciting, nutritious new recipes were not among those things. Due to the chaos of the holidays, a lot of convenient, no-frills meals were consumed at my house. Now that it's a new year, I'm eager to restock my fridge with fresh foods and get back into the kitchen.

My Christmas day meal was quite delish, but last night I made a pork tenderloin that I believe trumped my Christmas version, and was a lot less difficult. It was a completely last-minute meal--I had learned less than 24 hours earlier that my good friend Jessica would be coming into town for one night on a business trip, and I wanted to make us a great dinner. Without time to get to the store, I had to make due with what I had on hand.

Luckily, I had purchased a nice piece of pork tenderloin at Whole Foods on Sunday for no real reason other than that it looked pretty in the display case. But what to do with it? A quick search of pork tenderloin recipes on the Food Network website turned up a winner by Ina Garten (click here for the recipe). Not only was it rated 5 stars, but it used ingredients that I happened to have on hand. It helps that I have a lemon tree and a rosemary bush in my backyard!

I plucked six juicy, ripe lemons from the tree, pulled off a couple stems of rosemary, and got to work creating the marinade. I only had the chance to marinate the pork for a little over two hours instead of the recommended three, but it was so flavorful I can't imagine that an extra hour would have made a difference.

I served the pork alongside some corn (from the freezer), a spinach salad with pears and gorgonzola (the same one I made at Christmas, minus the pomegranate seeds), and some crusty whole wheat rolls (Alexia's frozen rolls, which are great to have on hand). The meat was super-moist, and SUPER-flavorful. I always find it so hard to make meats that are truly infused with flavor from the inside out, but this recipe was a home run.

I do think there were several contributing factors to why it was so good: 1) high quality meat, and 2) freshly picked and perfectly ripe lemons & rosemary). But I bet that even regular old pork chops and dried rosemary would taste great in this marinade. I'm sure I will be trying it out in several different incarnations over the years--especially since my girls even gobbled up this meat, and getting them to eat meat is one of my biggest challenges in life.

Now, to further inspire me in 2011, I am headed to a knife skills course at Sur La Table. Hopefully I won't maim anyone or chop off one of my fingers.

Wednesday, December 1, 2010

My favorite "I really need some greens" salad


I recently had the good fortune of traveling to Costa Rica for a friend's wedding (which is why I've been so neglectful of my poor blog). It was an amazing trip, but I don't think I ate a vegetable for five days, unless you count salsa. Between snickers bars at the airport, breakfast croissants heaped with cheese, bacon and eggs, and mountain-sized piles of rice, beans, and chicken, I wasn't exactly doing my best to eat healthy, well-rounded meals. Hey - that's what vacation's about, right?

So when I returned home, I found myself craving a giant bowl of greens. Enter my favorite salad: the arugula & spinach cobb salad. I love this salad because it contains good healthy greens (arugula and spinach vs. iceberg), as well as some decadent ingredients (bacon and avocado) that make it feel like a meal instead of a side dish. It's a good way to detox from decadent eating without getting too crazy on the healthy stuff.

This cobb salad can take on different forms, depending on what you have on hand. Here is a breakdown of what a typical "I really need some greens" cobb salad consists of:

Must haves:

Lots of baby arugula
Bacon, cooked well-done and crumbled.
Chopped avocado
Chopped hard-boiled eggs

Might haves:

Chopped tomato
Baby spinach
Sliced red onion
Meat/seafood such as turkey, chicken or shrimp

Dressing:

Some champagne vinegar
A few squeezes of fresh lemon juice
A healthy teaspoon of dijon (I always use Grey Poupon)
Some sprinkles of salt
Some dashes of pepper
Good olive oil

*I believe the correct ratio is 1 part vinegar to 2 parts EVOO. Whisk it all together and adjust ingredients to taste. It's OK if it tastes pretty tart - it just means you'll need less of it.

After eating this salad, I feel ready to face the world, and the gym, again. With Christmas approaching, I plan to fit this salad into heavy rotation over the next few weeks.

Monday, September 13, 2010

One dish fish

You've gotta love one-dish meals. First, clean-up is easy. Second, it's easy on the brain since you're not required to think up a complete meal with complimentary side dishes. Third, you don't have to perfectly time the different components of the meal (how annoying is it when your meat is steaming hot and ready to serve, but the potatoes are still hard as rocks?).

The problem I have with most one-dish recipes is that they almost always contain cheese or cream of some sort, which means I can't serve them to my whole family. And in this same vein, many one-dish meals are also supremely unhealthy (like the zillion casserole recipes that call for "cream of something" soup).

So I thought it was too good to be true when I saw *this* recipe for Tilapia with Hash Browns in my Food Network Magazine. It had the yum factor (hash browns), the healthy factor (fish & veggies), AND it was dairy-free!

I followed the recipe exactly, except for two things. I didn't add the garlic to the hash browns, since I was going to serve it to my semi-garlic-averse kids. And I only used a little bit of chopped olives because I pretty much hate olives. Get this - I really wish I had used more olives because the olives were my favorite part about the dish! I used manzanillo olives, and they were fantastic - they added a nice briny freshness to the dish, and as I was eating it I kept cursing myself for not putting in the full amount. So next time I'll know...

My girls ate at least 1/2 to 3/4 of the serving I gave them, which was more than I was banking on. I don't know if I would label it as kid-friendly for the 4 and under set, but older children should like it for sure. I mean, it has hash browns in it! And I recommend over-browning the hash browns a little bit to make them extra crispy.

Wednesday, August 18, 2010

Mango and wax bean smoothie (yes, I'm serious)

Almost every time I pick up my bountiful basket, I discover some sort of unique vegetable or fruit that I've never cooked with before. This past week it was wax beans. Wax beans are really just green beans that are yellow; and as far as I can tell, they don't taste much different.

At first, I thought I would steam or saute the wax beans and serve them as a side dish - just like regular old green beans. Then, while whipping up a delicious mango smoothie for an afternoon snack, I got an idea. Given the title of my post, I'm sure it's not hard to figure out what that idea was.

I thought the mango/wax bean combo might work for two reasons: 1) since the wax beans are pale yellow, they wouldn't turn the smoothie a strange color, and 2) the sweetness of the mango and banana would counteract any strange flavoring that the beans added.

Although I was anticipating a decent result, I was pleasantly surprised to find that the wax beans actually made the smoothie...wait for it...better! The beans gave it kind of a fresh, herbal taste and cut some of the super-sweet fruitiness. If you don't believe me when I say it was good, here is a quote from my husband: "I would never guess there were vegetables in here if you hadn't told me." He even described it as "delicious." And my kids loved it too!

I can honestly say I might buy wax beans from now on for the sole purpose of adding them to smoothies. I'm sure plain old green beans would work too, but they would throw off the coloring.

Here's what I threw in the blender:

2 ripe mangos, peeled and chopped
1 banana
2 handfuls of uncooked wax beans, ends trimmed
a few splashes of OJ
enough yogurt to make it creamy*
ice

*To make the smoothie non-dairy, I used So Delicious cultured coconut milk yogurt in strawberry. I am so grateful for the new So Delicious line of non-dairy products because they use coconut milk instead of soy. Coconut milk not only tastes sweeter and creamier than soy milk, but it's safer for people with dairy allergies since many of them are allergic to soy as well.

TIP: Since making smoothies can be a pain (all the peeling, chopping, washing, blending, etc), I've started making up a big batch of smoothie mixture without ice, and storing it in a sealable container in the fridge. Then when I want to make a smoothie later in the week, I can just pour some of the smoothie mix into the blender or Magic Bullet, add some ice, and I'm done!


Monday, July 26, 2010

Tuna steaks, heirloom tomato salad, and herbed green beans & potatoes

I have a love/hate relationship with food magazines. I get so excited when I see a new one on the newsstand or in my mailbox, with its glossy cover photos of delectable and artfully arranged dishes, and promises of “easy, fresh meals in under 20 minutes” or “10 spinach dishes you are guaranteed to love.” But inevitably I end up dog-earing maybe one recipe out of 100, and never get around to making that recipe anyway.

That changed when I picked up the August issue of Food & Wine magazine last week. About 90% of the recipes look amazing to me, and while they’re a little fancier than what I might whip up on a typical weeknight, they all use easy-to-find ingredients and simple cooking techniques. The recipes contain a lot of fresh summer produce, and the dishes seem light without being “lite” (ie: healthy, but bland and unsatisfying). I don’t know whether Food & Wine is always this good, or I just happened across a particularly great issue, but I plan on subscribing to find out.

I decided to use three of the recipes in a belated birthday dinner I made for my sis-in-law, Lauren, this past weekend. Usually I hesitate to make untested recipes for a special occasion dinner, but I just had a hunch that these would all turn out great.

Here’s what was on the menu:

Mustard-Seared Tuna with Shallot Cream
http://www.foodandwine.com/recipes/mustard-seared-tuna-with-shallot-cream

Potato Salad with Green Beans and Salsa Verde
http://www.foodandwine.com/recipes/potato-salad-with-green-beans-and-salsa-verde

Tomato Salad with Bacon, Blue Cheese and Basil
http://www.foodandwine.com/recipes/tomato-salad-with-bacon-blue-cheese-and-basil

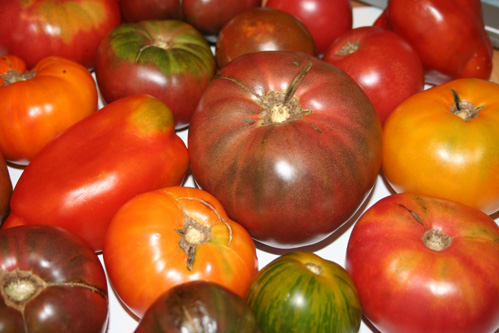
I pretty much followed the recipes exactly, and everything was delicious. For the tomato salad I used heirloom tomatoes from a local farmer’s market, just to give it a little more exciting color. I was always scared of heirloom tomatoes until I realized they’re not really any different from regular tomatoes with the exception of their color.

Making all three of these dishes was fairly labor intensive, and it was only possible because I had four people to entertain my wild children while I chopped, pureed, roasted, and sautéed. But each dish on its own would not be overwhelming at all.

So if you come across the August issue of Food & Wine, I highly recommend picking it up. Or just poke around on their website – I think they post almost all of their recipes online.

Thursday, July 15, 2010

Farmer's market potato salad

My daughters and I are spending our third consecutive July in Pennsylvania, enjoying visits with grandparents and friends, and indulging in local treats (fresh-from-the-factory Hershey chocolate and Yuengling Lager, just to name a few).

Growing up, I took for granted the abundant fresh summer produce, roadside stands, berry-picking farms, and endless green corn fields in PA. Now, after several years in the land of tumblweeds and cacti, I have renewed appreciation for the lush greenery and farmscapes here.

The other day we went to Roots market, an enormous farmer's market where you can find local baked goods, every type of produce imaginable, local delicacies and meats, and kitchy crafts. Since the girls were with us, I couldn't spend as much time as I wanted scoping everything out, but I did come home with a fair amount of goodies (including some of those ruby red radishes - how could I not buy those?)

I didn't have a plan while I was shopping, but when I got home and sorted everything out, I realized I had the fixins for a nice homemade potato salad. Here's what I used:

Small red-skinned potatoes
celery
fresh dill
green onion
hardboiled egg(s)
dijon mustard (I usually use Grey Poupon, but any dijon will do)
mayo
olive oil
salt and pepper
lemon

I usually boil the potatoes when making potato salad, but this time I decided to roast them. I chopped up the potatoes into bite sized pieces (leaving the skin on), drizzled with olive oil, salt and pepper, and baked them in a baking dish at 400 degrees for about 45 minutes, or until they were easily poked with a fork. After they cooled, I put them in a bowl with some chopped green onion, celery, dill, and hardboiled egg. Then I stirred together some mayo and dijon, and added a few squeezes of lemon juice. Depending on how much you salted the potatoes, you might want to add some salt too. Stir together and enjoy! You can add as much or as little dressing as you like - I probably put a little too much on...it would have tasted just as good with less.

Tuesday, July 6, 2010

Popsicles re-invented

Until a few days ago, I thought of popsicles merely as a kids' summertime treat - basically just colored sugar water that tastes really good when it's hot outside.

Then I came across two popsicle recipes that will forever change the way I look at popsicles. One is basically a cocktail on a stick; the other is an innovative way to get your kids (or yourself) to eat a healthy breakfast or snack.

Considering that it's going to be 110 degrees for the foreseeable future in Arizona, I have a feeling I will be spending a lot of time experimenting with new recipes for popsicles. In the meantime, here are the two I was inspired by:


1)Watermelon vodka popsicles with fresh mint

When I saw Giada DeLaurentis make *these* watermelon vodka popsicles on her show, I just had to try them. Unfortunately I decided to make them for a BBQ we were attending later that day, failing to notice the part of the recipe where it says they need to freeze at least 10 hours or overnight. Oops.

So we didn't have watermelon vodka popsicles that day, but we did have watermelon vodka slush, which was probably just as good. And when I stirred some of the slush into the lemonade/citrus vodka drink my friend had made...heaven! My husband wasn't a fan of the mint, but it probably can be eliminated or maybe replaced with a tamer herb - like basil?? I'm thinking some cucumber could even be thrown in to cut the sweetness.

2) Breakfast popsicles

A few days ago, I stumbled across *this* blog post about serving popsicles for breakfast. After my recent breakfast cookie experiment, I was excited to find another fun way to serve healthy foods for breakfast.

I haven't had a chance to make these yet, but my mind has been swimming with possibilities - especially since I recently discovered an amazing non-dairy beverage that tastes like drinkable strawberry yogurt and would probably be perfect in this recipe.

To further my excitement about popsicles, I saw *this* awesome popsicle mold on the front of the Williams-Sonoma catalog. Basically you keep it in the freezer, and it will freeze a popsicle in 7 minutes. So that would eliminate the whole "oops - I forgot to wait 10 hours" thing. It's a little pricey at $50, but if my popsicle obsession becomes full-blown, I may just have to spring for one.

Tuesday, June 22, 2010

Fish tacos


While living in LA, I came to really love fish tacos. I can't think of anything better to eat on a warm summer day, washed down with an icy cold margarita. Over the years, I've had many variations of fish tacos using different types of fish, different seasonings, different toppings, and different preparations (usually grilled or battered & fried). To create my own recipe, I combined the things I liked best about every fish taco I'd ever eaten. My favorite part about my version is that it has the crunchy satisfaction of the fried fish without the guilt.

This recipe can easily be used for regular fish tacos, or "deconstructed" fish tacos - a spin I created in honor of Top Chef.

Here's what you'll need:

For the fish:

Firm white fish (I have the best results with mahi mahi)
seasoning (more on that below)
panko bread crumbs
olive oil

For the slaw:

red & green cabbage
mayonnaise (you can sub in light mayo if you're watching calories/fat)
hot sauce
cilantro
fresh lime juice
salt
chipotle pepper (optional)
sour cream (optional)

For the toppings:

diced tomato
diced red onion
chopped cilantro
sliced avocado

For the wrapping:

Fairly large flour tortillas

Directions:

I start out by chopping everything for the slaw and toppings. To make the slaw, I chop the red and green cabbage into thin ribbons. Then I create the "magic white sauce." The magic white sauce doesn't always have to be the same - it's something you can play with based on your own taste preferences.

I start with a base of mayonnaise, then add lime juice until it's a thinner consistency. Then I add a few dashes of hot sauce, some chopped cilantro, and some salt. You can play with it as much as you want until it tastes good to you. If I'm not making it for my dairy-allergic daughter, I sometimes add sour cream for extra bite. And if you love chipotle peppers, you'll love them in this dish...just chop one or two and throw them in. Toss a few spoonfuls of the sauce with the shredded cabbage and set aside.

*Tip: reserve some extra white sauce for topping.

For the toppings, I chop up some tomato, red onion, and cilantro and mix them together in a bowl. Then I slice some avocado.

Now it's time to cook the fish. I cut fillets of mahi mahi into strips and dredge in Simply Organics Fish Taco seasoning. If you can find this at a store (it comes in a paper packet, like taco seasonings), I highly recommend it. If you can't find it, you can substitute regular taco seasoning or other southwestern seasoning. Or if you're really ambitious, you can make your own. Here are the main spices in the Simply Organics seasoning: paprika, garlic, sea salt, red chili flakes, dried onion, cilantro, cumin, black pepper, coriander. I'm sure if you doused the fish in just a few of those seasonings and some salt and pepper, it would still taste great.

Let the fish marinate in the spices for a few minutes, then roll in panko breadcrumbs. Saute the fish sticks in olive oil until they flake with a fork.

To assemble regular tacos: Spread the cabbage slaw on a flour tortilla, top with fish, then with tomato mixture and avocado. Add some hot sauce if you like, and some leftover white sauce.

To create a "deconstructed fish taco:" Instead of cutting the mahi mahi into strips before cooking, leave them as whole filets. Prepare the fish the same way as described above - dredge in seasoning, then coat in panko and saute. After the fish is cooked, mound a bed of the cabbage slaw on a plate, top with the fish filet, and top the filet with the tomato mixture and avocado. Drizzle leftover white sauce over the top and sprinkle crushed tortilla chips over the whole dish.

Pour yourself a margarita or a glass of white wine and prepare to impress all your friends!

Monday, April 19, 2010

Fancy French scallop dish that's really, really easy

Any dish that requires me to speak in a foreign accent scares me. So when Ina Garten (ie: The Barefoot Contessa) said she was going to be making scallops provencal on her Food Network show, I almost changed the channel. But that would have required me to remove my butt from the couch and fetch the remote during my vegetation period (ie: the 30-45 minutes when the girls are both napping at the same time); thus I decided to just lie still and watch it. And I'm so glad I did.

After watching her make this elegant scallop dish in a matter of minutes, without any complicated techniques or ingredients, I thought "Heck, I could do that!" And that I did...in fact, it was so easy & good, I made it twice in two weeks.

The thing that appealed to me about this recipe was that it uses really simple ingredients, most of which I already had on hand: scallops, butter, white wine, shallots, garlic, flour, a lemon, and some fresh parsley.

And the only kitchen gadgets required were a pan and some tongs. See - I told you it was easy! You can find the recipe by clicking here.

The more I learn about cooking, the more I discover that truly good food can be really, really simple. I've also learned that you can never go wrong mixing butter, white wine, garlic and lemon...so many great seafood dishes start with these basic ingredients!

P.S. For a side dish I made parmesan smashed potatoes, which are also extremely easy. You boil some red-skinned potatoes until they're soft. Then smash them with a fork (keep the skins on) and add some extra-virgin olive oil, parmesan cheese, and salt. Just keep smashing and tasting until it seems right.

It would also taste amazing over pasta!