Tuesday, February 16, 2010

Kale chips rock!


Kale is one of those foods I've been hesitant to embrace. I know it's really, really good for you, but there's something about the texture of cooked greens that turns me off. I love salads, and I don't mind some cooked greens thrown into an omelet or sauce, but I don't like a pile of cooked greens on my plate no matter how well it is seasoned or what it is paired with.

So I was intrigued when I came across a recipe for kale chips. Basically all you do is tear off bite size pieces of kale leaves (don't include the stems), spritz or drizzle with olive oil, sprinkle with some salt, and bake in the oven for a few minutes, until they turn crispy and the edges just barely start to brown.

I was skeptical, but since I got some kale in my bountiful basket this week, I decided to give it a try. And it honestly was good. The texture is really light and crispy. It almost melts in your mouth. The kale flavor isn't completely eradicated, but it takes on a kind of nuttiness that makes it much more palatable than when it's eaten raw.

The best part of my little experiment was that my girls loved it! I told them I made "green chips" and set a bowl outside where they were playing. A few minutes later, that bowl was empty.

I'm so excited I found a way to enjoy a really healthy food, and it's SO easy. The only confusion came from figuring out what temp to cook them at. When I googled "kale chips" I found a bunch of recipes that were all basically the same - but some said to cook them at 400 degrees for 5 minutes, and others said to cook around 200 degrees for 25-30 minutes. I split the two down the middle and roasted them at around 325 degrees for about 15-20 minutes. I don't think it matters which way you do it - the key is to keep an eye on it until you see the edges of the leaves start to curl and brown.

Monday, February 8, 2010

Crockpot pork chile verde

I don't know what made me happier - finding a way to use up a big portion of my "bountiful basket" offerings from last week, successfully replicating one of my favorite Mexican dishes, or the fact that I made this dish in my crock pot. I LOVE the idea of crock pot meals because there's nothing I hate more than trying to get dinner together when I'm exhausted, hungry, and uninspired, and two little munchkins are nipping at my heels. Oh, and a fourth thing that made me happy was that I tried something new - roasting peppers & garlic. It's totally easy, but for some reason I'd never done it before and therefore it seemed kind of scary.

So here's how I made the chile verde...

Ingredients:

1.5 pounds of pork butt (I think it's actually pork shoulder, but for some reason it's called pork butt.) Trim off any excess fat and cut into ice-cube size chunks

8 tomatillos, with the papery husks peeled off

5 anaheim chiles

5-6 cloves of garlic, unpeeled

2 jalapeno peppers

1/2 onion, diced

1 can vegetable stock

salt

Put the tomatillos, chiles, jalapeno peppers and garlic cloves in a baking dish, spritz with olive oil, and place in the oven under the broiler. Turn them occasionally until the skins have kind of blistered and turned brown on all sides. (Since my broiler kind of heats unevenly, I removed things one by one as they became perfectly roasted. And I removed the garlic first, since I read that it can become bitter if it gets too browned).

Place all of the roasted stuff into a food processor or blender and puree. It doesn't have to be super-smooth, just evenly blended. Then pour the mixture into a crockpot set on high. Add the vegetable stock (you can use chicken stock too...I just happened to have the veggie stock on hand).

Dredge the pork butt chunks (OK, that just sounds wrong) in some flour seasoned with salt and pepper. Saute in a pan until browned on all sides, but not cooked through. Then add to the mixture in the crockpot. Saute onion in the pan until soft, then add the onion to the crock pot too.

Once the crockpot contents become pretty hot, turn to "low" and cook a few hours until the pork is nice and tender. Season with salt to taste.

Disclaimer: I lucked out in that my chile verde came out with the perfect amount of heat - nice and spicy, but not insanely spicy. I know jalapenos can vary in intensity, so you might want to test your jalapenos before you put them in, just to see how hot they are. If your chile's too hot, try adding some additional stock or pureed anaheim chiles to tame it. If it's too mild, you can always add some extra jalapenos.

Tuesday, February 2, 2010

Saving money on healthy foods: Part 2


When it comes to saving money, nothing beats buying directly from the source. With material goods, this usually means you have to buy a large volume of items at a "wholesale" price. With food, however, there are several ways you can buy directly from the farm without having to order crates of eggs or 20 pounds of beef.

The obvious way to do this is through farmer's markets. I grew up in a Pennsylvania town surrounded by farms, where there were tons of roadside produce markets offering up fresh sweet corn, juicy tomatoes, peaches, melons, and all other kinds of delicious summer veggies and fruits. When I lived in Los Angeles, I frequented weekend farmer's markets that went on for blocks and were every bit as much as "scene" as the nightclubs (once I saw Marilyn Manson there!).

Unfortunately, here in Arizona the farmer's market fare is a little lackluster, seeing as how it's the desert and all. But I've found some other ways to buy farm-fresh foods at a low cost with minimal inconvenience.

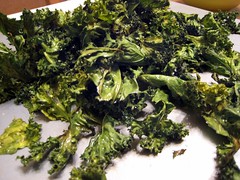
CSAs are Community Supported Agriculture groups. Basically, you pay a monthly or weekly fee to a local farm, and then pick up a basket of produce from said farm on a monthly or weekly basis. There are several great things about joining a CSA. 1) You are supporting a local farm; 2) You are guaranteed fresh, seasonal produce; 3) You are exposed to new foods you might not necessarily have purchased yourself. The only con is that you can't control what you get. It's possible you'll end up with a huge bag of beets and kale; so if you hate beets and kale, you're kind of screwed. But most CSA farms will provide you with a list of the veggies & fruits they grow, so you won't be completely shocked by what you end up with.

If you're interested in joining a CSA, or just want some more info, you can look up the participating farms in your area at this website: www.localharvest.org.

If you have the fortune of living in Arizona, Idaho, Utah or Washington, you may have a "Bountiful Baskets" co-op in your area. This is a group of volunteers who buys directly from the same suppliers that service grocery stores and restaurants and then pass the savings along to the participants. Much like a CSA, you pay a weekly fee and then go pick up your "surprise" basket each Saturday. You can do it as often or as rarely as you like, so there's no ongoing commitment. Also, you can choose between conventional or organic produce.

I've been meaning to do this for weeks, but kept balking at the pick-up time (7:00 am Saturday). I finally went for it this last week, though, and I'm so glad I did! Here is what I got for $30:

Organic produce:

6 oranges
6 red-skinned potatoes
3 mangoes
6 red anjou pears
1 cucumber
1 head of romaine lettuce
9 kiwis
10 apples
1 bunch of celery
1 turnip
1 head of broccoli
9 roma tomatoes
1 bag of onions

I also got a "mexican pack" containing:

3 avocados
10 key limes
10 tomatillos
2 onions
1 bunch of cilantro
4 jalapenos
6 anaheim chilis
1 head of garlic
1 pack of flour tortillas

ALL of that for $30!! I was really amazed and excited. Aside from the fact that I scored a great deal on all that produce, I felt inspired by some of the unusual foods I got. I've already tried two experimental dishes - one a success, the other a failure. I will post the recipe for my success (pork chile verde) soon, along with my other experiments. I am challenging myself to use everything in the basket before it goes bad, so I'm sure it will result in some interesting meals.