Friday, December 30, 2011

Turkey leftovers: BLT turkey sandwich with herbed mayonnaise

I know this post is a little late to be useful this holiday season, but hopefully it will serve as inspiration the next time you make a giant roast turkey (or any meat for that matter) and have lots of leftovers.

It had been a while since I made turkey. I've been fortune to skip Thanksgiving cooking duties the last few years, and the last few Christmases I've gone off the grid, experimenting with short ribs, pork loin and other non-traditional meats.

But since I can never resist experimenting a little, I decided to make a stuffed turkey breast instead of a whole turkey. I stuffed it with herbs and bacon, and it was delicious and very tender. (I promise to share that recipe next time a holiday rolls around).

The butcher claimed I needed at least a 6-7 lb breast for 5-6 people, but we were left with a ton of leftovers. And since one of my new years resolutions is to avoid wasting food, I needed to find a use for them. I have a million food magazines with a million ideas for turkey leftovers, but none of them inspired me. Most involved chopping up the turkey and creating some sort of casserole with leftover mashed potatoes and/or or cranberry sauce. Blech.

Since the turkey already had an herb-y taste, I wanted to keep the flavor profile the same. So I bought some yummy ciabatta rolls and made a BLT type sandwich with herbed mayo. It was SO good, and it didn't scream "leftovers" the way that some other recipes do. Plus it was easy. Here's what was in it:

Ingredients

Ciabatta rolls
Arugula
Thinly sliced tomato
Sliced avocado
Bacon, nuked until crisp
Slices of leftover turkey
Herbed mayo (simply chop up whatever herb or herbs you have on hand and whisk together with a little mayo. I used sage, but plenty of other ones would work...thyme, oregano, tarragon...)


Directions

Slice the ciabatta rolls in half and tear out some of the inner bread to make it more light. Spritz with olive oil and broil for a few minutes until crispy. Spread a thin layer of the herbed mayo on both sides of the bread. Layer on the other ingredients. Close the bread and either cook in a panini press, or just push down hard with your hands until it flattens out a little bit (what I like to call the lazy girl's panini).

I really looooove making gourmet sandwiches at home--it's such an easy, satisfying meal. Ever since I've discovered the ciabatta roll, I've been hooked. I know it's not the healthiest grain in the world, but it freezes really well, so it's easy to stock up in the freezer and have them on hand as a vehicle for leftovers, eggs, last minute guests, or just about anything you can think of.

Happy New Year!

Thursday, November 24, 2011

A home cook tackles chef Jonathan Waxman's famous roast chicken & salsa verde...and wins!!!

A recent issue of Food and Wine Magazine featured some of our country's most famous chefs and their signature dishes. The one that immediately caught my eye was Jonathan Waxman's Roast Chicken with Salsa Verde (aka: pollo al forno), which is a staple at his NYC restaurant, Barbuto. The main thing I liked about it was its simplicity. The actual chicken requires no marinating or complicated sauces...you basically just cut it up, stick it in a pan, and stick it in the oven. The second thing I loved was the salsa verde. Having eaten at one too many Tex-Mex restaurants, when I think of "salsa verde," I immediately think of a concoction of tomatillos, cilantro, onion, and green chiles. So I was surprised to see Waxman's Italian salsa verde, which is a mixture of fresh herbs, capers, arugula, garlic, lemon juice, and some other yummy stuff.

What daunted me most about the recipe was the idea of cooking a whole chicken. Now I've cooked plenty of chicken in my life, but only one part at a time: breasts, legs or thighs...all pre-cut, nicely arranged in pretty little rows inside a neatly wrapped package. But a whole chicken? With all its weird innards, bones, and ligaments? It scares me.

What gave me the courage to try it was this youtube video I found of Jonathan Waxman himself cooking the aforementioned chicken. As soon as I watched the video, I couldn't NOT cook the chicken. Watch it yourself and tell me you don't feel the same way.

Everything about the video--the music, the fresh herbs strewn on the cutting board, the flickering flame inside the oven, Waxman's laid back "anyone can do this" vibe--inspired me. Again, I challenge anyone to watch that video and NOT want to make that chicken. So I went to the store, bought the freshest whole chicken I could find, and set to work.

If someone had been in my kitchen, the video of me trying to prep the chicken might have become a youtube sensation of its own. See, the part where Jonny (I feel like I can call him that since I've made his chicken) takes his scissors and neatly cuts through the chicken's back like he's cutting a piece of tissue paper? Well when I did that, it looked like I was trying to chop down a tree with a pair of pruning shears. And that part where Jonny takes his hands and, with one slight shove, cracks the chicken's spine in two? Well I literally had to climb on top of the chicken, mount it, and bounce up and down until I got it to crack. But the point is, I DID it. It wasn't as pretty, but I guarantee the end result was just as tasty.

As for the salsa verde, it's pretty foolproof. If you don't have the same herbs he recommends (parsley, mint, tarragon, and rosemary), you can substitute or omit at will. In fact, the printed version of his recipe apparently uses different herbs than he does in the video. You can find the print version here. I used basil instead of mint, and it turned out awesome. I don't think you can go wrong. Since he didn't give measurements in the video, I just eyeballed the amount he used and aimed for the same amount.


After talking this dish up so much (I texted my husband something along the lines of: "BTW, when you get home tonight, you will be transported to Manhattan's West Village, where you will eat the signature dish of a Top Chef Master. It's a $19 dish!"), I was a little nervous about actually serving it. But it totally lived up to the hype. It's a simple dish, yet it tastes totally upscale. It's comfort food, yet its healthy. It's something the whole family will enjoy eating. And the leftovers can be made into an excellent soup (but that's another whole post...one I'll hopefully get to one of these days). 

The bottom line is: watch the video, make the chicken. You won't regret it! 

Friday, November 4, 2011

Buffalo Chicken Salad (aka: How to satisfy your chicken wing craving without guilt)

A few weeks ago I was sitting on the couch while my girls were taking a nap, wondering whether I could come up with a buffalo chicken recipe that would actually be healthy. See, I love me some really crispy, spicy chicken wings, but the main reason I crave them is the buffalo sauce. And buffalo sauce itself isn't unhealthy--it's just some vinegar and chili peppers. It only becomes unhealthy when you combine it with tons of butter, a deep fryer, ranch dressing, or mounds of cheese (as in my favorite recipe for buffalo chicken dip).

As I was sitting there pondering potential recipe ideas, I heard a voice say: "Buffalo chicken salad." God? I thought, looking upward. Then I realized that the voice belonged to Ellie Krieger, who was speaking to me from the TV. Well she wasn't actually speaking to ME, but it felt that way. It was as if she'd read my mind.

Ellie is known for putting healthy spins on traditionally unhealthy dishes, so I was excited to see what she whipped up. The trick to her salad was to make her own blue cheese dressing, which uses fat free yogurt as a base in place of tons of mayonnaise. She also used plain chicken breasts doused in buffalo sauce and broiled in the oven.

I made the recipe ASAP, and it turned out great! Here is a link to the recipe on the Food Network site.

A few things I did differently:

1) Instead of spending money on buttermilk for one recipe, I created my own using vinegar and milk. To do this, just place 1 tbsp of white vinegar in a 1-cup measuring cup. Fill the cup to the top with milk. Let stand for 5 minutes: Voila! You've got buttermilk!

2) To boost the flavor of the dressing, I added about half a packet of dry ranch dressing mix in place of the sugar.

3) Instead of using just romaine hearts, I used a mix of romaine hearts and a darker leafier green (to boost the nutrients)

Also, unless you're partial to a certain buffalo sauce, I definitely recommend using Frank's Red Hot. It has great flavor that can't be beat (in my humble opinion). This is a recipe I will be making again and again. It's great for a light weeknight dinner or for entertaining. Your guests will love you when you tell them that it's guilt free.

Tuesday, October 18, 2011

Spaghetti carbonara, the healthy version (with a mystery ingredient)

"Ewwwww! What's that for?" my husband said as I tried (unsuccessfully) to bury a tiny tin of anchovies into the bag of groceries I was packing for our family getaway to the mountains. 

"Don't worry about it," I said dismissively. But he wouldn't let up. "You're not cooking something with those, are you?" he said, his face contorted just like our three-year-old's when I try to serve her anything resembling a vegetable that's not a pea or a carrot.

"You'll like it!" I yelled. I tend to get a little testy when people complain about food they haven't even tried...just ask my kids.

Trust me, I don't like anchovies either. I'm not ordering them up on pizza or popping them in my mouth right out of the can. But in my adventures in cooking, I've learned that a teeny weeny bit of anchovy can add some yummy brininess to a dish without making it taste fishy. And when my husband finally tasted the end result: "Spaghetti with Anchovy Carbonara," he admitted he'd judged the little fishies too hastily. My four-year-old even declared it delicious and polished off her whole bowl!

Spaghetti carbonara is one of those dishes that always pops up on "guilty pleasure" or "comfort food" shows." Traditionally it's made with pasta, bacon and lots of egg yolks and cheese, so it's pretty much a giant bowl of cholesterol problems waiting to happen.

In a recent issue of Food & Wine magazine, I came across a recipe for carbonara that actually looked healthy, not to mention tasty and simple to prepare. I tore it out and took it along on my family's weekend in Flagstaff, where we were planning to spend our time snuggled up in front of a fire, cooking and eating a lot. I wanted to make something that would be comforting, warm, and filling. This fit the bill. The sauce is made up of some herbs, garlic, lemon zest, a few egg yolks, and - yes - some anchovies. But they dissolve! So you really can't even see them. And the best part was that it was done in under 30 minutes. 

Try it - you'll like it! If you like caesar salad, you'll like this pasta. If you don't, you're free to leave me nasty comments.

Spaghetti with Anchovy Carbonara (from Food & Wine magazine, April 2011)

**I recommend doubling the ingredients for the sauce. There was just enough to coat the pasta, but I definitely could have used more.

12 oz spaghetti (I used whole wheat)
1/4 cup extra-virgin olive oil
3 large garlic cloves, chopped
One 2-oz can flat anchovies, drained and chopped
a pinch of crushed red pepper (I left this out because of the kiddies)
1/2 tsp finely grated lemon zest
1 tbsp chopped oregano
1/4 cup chopped flat leave parsley
2 large egg yolks
salt and freshly ground pepper

1. In a large pot of salted boiling water, cook the spaghetti until al dente. Drain the pasta reserving 1/2 cup (I say 1 cup) of the cooking water.

2. In a large, deep skillet, heat the oil with the garlic and anchovies and cook over moderately high heat until the anchovies have dissolved, about 2 minutes. Add the red pepper, zest, oregano and parsley, then add the pasta and toss to coat. Remove from heat.

3. In a small bowl, whisk the yolks with the reserved cooking water and add to the pasta. Cook over low heat, tossing until the pasta is coated in a creamy sauce, about 1 minute. Season with salt and pepper and serve.

Thursday, September 15, 2011

Fall food: tortellini soup

This is the time of year when I've been known to fly into a rage at the mailbox. Why? Because my food magazines start arriving, chock full of gorgeous, fall-inspired stews, soups, and hearty dishes meant to nourish the belly and the soul on those crisp fall nights when you can't quite shake off the chill. And there I am, dripping sweat from walking to said mailbox in the 100+ degree temps, unable to fathom sitting down to a bowl of broccoli cheddar soup any time soon.

Well this year, I'm going to take on a new attitude and pretend that it's fall, despite what the thermostat says. I'm even feeling grateful for my hot, but mostly harmless weather in light of all of my east coast friends who have been inundated with rain, floods, and other unpleasant weather events over the last few weeks.

Interestingly enough, the recipe I found most exciting in my newest Food Network magazine was part of an ad by Sam's Club. Not only did it look tasty and family-friendly, but I noticed that I already had most of the ingredients on hand; the ones I was lacking were easily substituted or omitted. I whipped it up this afternoon while the girls were eating lunch, and having already tested out a bowl, I can vouch for it being yummy as well as simple and quick to make. And if it were raining outside, or I was looking at colored leaves instead of a cactus, it would probably make me feel warm, fuzzy, and fall-ish too.

Tortellini soup (adapted from Sam's Club ad in Food Network magazine)

1 lb ground beef
3 tbsp Italian Seasoning (I didn't have any Italian Seasoning on hand, so I used some Mrs. Dash (spicy), and some oregano)
1 tbsp paprika (I used smoked paprika because I love it)
salt
pepper
1/2 cup onion, diced
2 cans (14.5 oz each) diced tomatoes)
1 can corn, drained (I omitted this because I'm not a huge fan of corn in soups)
2 cans (14 oz each) chicken broth
2 cups water
1 tbsp garlic, minced
4 cups baby spinach
1 cup carrots, sliced
Several handfuls of tortellini or pasta of choice (I wanted to use tortellini, but was too lazy to go to the store, so I just used elbow noodles. Tasted great, but not as pretty as the tortellini would've been)
1 cup Italian blend cheese, or parmesan, for topping (optional)

Preparation:

In a large skillet, brown the ground beef and onions, stirring in the seasoning, paprika, and a few hearty dashes of salt and pepper. Once the beef is almost fully cooked, drain the mixture and transfer to a large pot.

In the pot, combine the beef mixture with the tomatoes, corn, chicken broth, water, garlic, spinach and carrots. Bring to a boil. Add pasta and boil until pasta is cooked. Reduce heat to low and simmer for 20 minutes. Taste and add additional salt, pepper, and seasonings until you're satisfied with the flavor.

Top each bowl with cheese, if you so desire. And, as always, I recommend serving with a nice big chunk of crusty bread.

Monday, September 12, 2011

How to eat spinach like Popeye without really trying

A long time ago, I posted about my unfortunate waste of a package of organic baby spinach. Since then, I've put in a concerted effort not to repeat my mistake. The result has been kind of surprising: I find it's pretty easy to get through a pack of spinach in a matter of days. And here's the kicker - I don't even like spinach that much!

When I started this blog, one of my goals was to learn to eat veggies and other healthy foods in ways that were truly enjoyable...no nose-holding or grimacing; no bribing myself (or my kids) with treats as a reward for choking down some stinky vegetable in the name of a well-balanced diet. In this vein, I have sought out ways to genuinely like eating spinach, and I can proudly say that my relationship with this nutrient-dense little leaf has reached new heights. I no longer buy a package of spinach because I feel obligated, but because I've found so many yummy and easy ways to incorporate it into my diet. Here they are:

1) Pile it (I mean REALLY pile it) on a sandwich.

I got this idea when I ordered a turkey avocado sandwich from my gym's cafe. It was served on ciabatta bread, and simply heaped with spinach. At first I thought it was too much. But then I took a bite...and I hardly even noticed it was there. In fact, it really added to the sandwich - gave it a little crunchy texture and some moisture, since spinach is so water-dense. From now on when I make a turkey sandwich, I don't just slap a sad little lettuce leaf on there; I go crazy with the spinach. It's like having a sandwich and salad all in one.

Another little tip: If you are like me and looooove a good crusty bread, but are trying to avoid white bread and the carb overload that comes along with it, ciabatta rolls are a good choice. They're light and airy, not super heavy. And what I usually do is slice it in half, then pull out chunks from the inside of each half so it's mostly just the outer crust that's left. Then I broil it in the oven for a few minutes to give it some added crunch. It's all the pleasure of crusty bread without all the calories.

2) Throw it in a smoothie.

Spinach has become a regular ingredient in my smoothies, both for myself and for my girls. If you make a dark smoothie and can't actually see the spinach, you'll never guess it's in there. I promise. I know a lot of people will be skeptical about this, but it's true. Here's one of my favorite concoctions: blueberries, strawberries, pomegranate juice, spinach, banana, yogurt, and enough ice to make it cold (if you're not using frozen fruit). It's a perfect way to get your veggies, fruits and protein all in one.

3) Saute with garlic and serve with ravioli or tortellini.

I've never really been into sautéed spinach as a side dish. Just picking up a forkful of spinach and eating it doesn't appeal to me (although I'm hoping some day it will). However, picking up a forkful that contains spinach and some yummy pasta is super appealing. Ever since I've discovered this, I no longer feel like I need to eat a salad alongside my pasta. Instead I do this: heat some olive oil and chopped garlic in a pan on medium-low. Add a lot of spinach (you'll be amazed how small it gets when it wilts) and slowly stir until it starts to wilt. Add a few dashes of lemon juice and some white wine (if you prefer). Season with salt. Serve underneath a few raviolis or some tortellini. Now you can turn your bag of Costco ravioli (we all have one, right?) into a well-rounded, semi-homemade dinner.

4) Chop up and add to soups, sauces, and eggs.

As I mentioned above, what seems like lot of spinach turns into a teeny tiny bit of spinach when it's cooked. And I find the taste of it to be fairly innocuous when paired with something else. I love stirring some into scrambled eggs, especially when you add some smoked salmon. I also throw it into jarred pasta sauce when I'm heating it on the stove. Pre-made soups are another great chance to add some spinach in your life.


Here's to no more spinach in the garbage!

Tuesday, August 23, 2011

Refreshing, and pretty too!

Creating little bits of restaurant-style luxury at home can be really simple to do. It requires nothing more than a carefully drizzled sauce, a piece of bread stuck under the broiler until it's crispy and warm, or some fresh herbs stirred into a canned soup or mayonnaise.

Recently I have been finding ways to spruce up the most basic thing in the world: water. I feel like I am constantly trying to drink more water, and constantly falling short. I know why I should be drinking it: it's one of the simplest and cheapest things we can do to provide a ton of benefits, including weight loss, increased energy, elimination of toxins, nice skin, etc. But knowing what to do and actually doing it are vastly different things.

Part of my problem is that I get bored with plain old H2O, and another issue is that I simply forget. It sounds dumb, but unless I'm dying of thirst or there's a glass in front of my face, it doesn't always occur to me to drink. In that vein...I am super excited about my new little discovery: infused water.

During a recent vacation to California, my husband and I stayed at a lovely Marriott in Marina del Rey. Every time we entered the lobby, we were met with a big glass water dispenser filled with infused water--a different flavor every day. It was ice cold, just a teeny bit sweet, and super refreshing. I kept finding myself going back to that water thingy again and again, suddenly excited about hydrating myself. It was partly because it was yummy and fancy, and partly because it was just there. You couldn't walk by it without pouring yourself some, and that--for me--seemed to be the key to the whole thing.

So as soon as we returned to AZ, I went out and purchased myself one of those lovely glass water dispensers (mine was $19.99 at Home Goods, but they can be found just about anywhere that sells kitchen supplies). I filled it up with some filtered water, lemon slices and cucumber slices, and I was suddenly transported back to the Marriott...except that instead of boats gliding through the water, my view was of a living room filled with Barbies and puzzle pieces.

Because the water dispenser sits on my kitchen counter, I am reminded all day long to keep drinking. And I have been having fun experimenting with different flavor combinations. Here are some I've tried out so far:

Cantaloupe & fresh mint
Watermelon & fresh mint
Lemon & fresh rosemary

And some I intend to try...

Strawberry & fresh basil
Lemon & orange

The possibilities are endless! And you don't need much to give it flavor--just a handful of fruit and/or a few sprigs of herbs. There's nothing wrong with just lemon either; it'll still look pretty on your counter and remind you to drink up. Cheers!


Wednesday, August 10, 2011

The best smell in the world


Is there anything better than walking into a house and smelling something delicious cooking? It may sound a little June Cleaver-y, but I feel all warm and fuzzy inside when my husband, my girls, or a guest walks into my kitchen and says "Something smells great in here!"

Plenty of foods can inspire that sentiment...cookies in the oven...pasta sauce bubbling on the stove. But of all of the food scents out there, nothing does it for me like the smell of garlic, olive oil, and white wine simmering together. It transports me to my happy place, where I'm sitting on a lovely deck overlooking Napa Valley vineyards, a cool glass of chardonnay in hand, reading a cooking magazine while soft jazz plays in the background.

Any time I see a recipe that involves simmering garlic in white wine, I know it's going to be a winner. And when you throw in some shrimp, tomatoes, lemon zest, and fresh parsley, it would be pretty impossible to go wrong.

This recipe was largely inspired by Ina Garten's "Roasted shrimp with feta," but since I omitted quite a few things, and adjusted the presentation, I thought I'd rewrite my version of the recipe here. I went for a simpler approach, eliminating things like Pernod (who has Pernod on hand?) and fennel, and forgoing the breadcrumb topping in favor of serving the dish alongside my favorite thing in the world: crusty bread.

"Roasted shrimp with feta" (or, as I like to call it: "Roasted shrimp in garlic, tomato and white wine broth") Recipe semi-stolen from Ina Garten.

Ingredients:

Several tbsps of good olive oil
3 cloves of garlic, minced
1/4 cup dry white wine
1 can diced tomatoes (or use fresh)
2 tsp tomato paste
1 tsp dried oregano
1 tsp salt
1/2 tsp freshly ground pepper
1 1/2 lbs shrimp (peeled and deveined, with tails on)
5 ounces feta cheese, crumbled
2 tbsp minced Italian parsley
2 lemons (plus the zest from one of them)

Directions:

Pre-heat the oven to 400 degrees. Heat the olive oil in a large skillet that can be safely transferred to the oven. Add the garlic and saute over medium-low heat for one minute. Add the wine and bring to a boil. Cook for 2 to 3 minutes, until the liquid is reduced. Add the tomatoes with liquid, tomato paste, and oregano. Add salt & pepper to taste. Simmer over medium-low heat for 10-15 minutes, stirring occasionally.

Arrange the shrimp, tails up, in one layer over the tomato mixture in the skillet.* Scatter the feta evenly on top. In a small bowl, combine the lemon zest and parsley with 2 tbsp of olive oil. Sprinkle over the shrimp. Bake for 15 minutes, until the shrimp are opaque and tender. Remove from oven and sprinkle the juice of one lemon on top.

*I have to admit that I struggled with the whole "arranging the shrimp artfully" thing. My shrimp didn't really stand up in the pan...they kind of just fell over on top of one another. So when I removed the dish from the oven, I ended up dumping everything into a big bowl and serving it like that. I actually think it came out kind of better that way, since we could just dish the shrimp and tomato mixture into individual bowls, and then sop up the juices with that crusty bread I was talking about earlier.

Next time I make this, I might leave out the oven altogether, and just saute the shrimp right in the pan. I think the only real reason to bake it was to brown the breadcrumbs, but since the breadcrumbs are excluded in my version, the oven is probably unnecessary.

No matter how you end up cooking the shrimp, you can't really go wrong with this recipe. It's great for  entertaining, and--like so many of my favorite recipes--it can work as either an appetizer or a light dinner. It could also be served over pasta if you're looking for a heftier meal. And it would work perfectly fine without the feta, if you don't feel like buying it, or want to go dairy-free.

Tuesday, July 19, 2011

Chicken and white bean chili

My poor mom...her cooking has taken a lot of ribbing over the years. It wasn't that she was incompetent in the kitchen, just that she sometimes had a knack for picking recipes that were born to be failures (mini franks simmered in grape jelly, for example), or making the same things over and over until we begged for mercy (like the 3-month chicken finger fest that occurred sometime during 1996).

Like a fine wine, however, her cooking has gotten much better with age. And the other night she made a yummy and very blog-worthy chicken chili recipe, which she had clipped from the pages of the local PA newspaper. Everyone at the table declared it "really good." I think the word "delicious" might have even been thrown around.

The nice thing about this chili is that you can adjust the seasonings to suit your heat tolerance; if you aren't into spicy foods or want to make it kid-friendly, then eliminate the cayenne. If you want to spice it up, you can throw in some diced jalapenos, add more cayenne and cumin, and use pepper jack cheese instead of regular Monterey Jack.

Here's the recipe: (adapted from the Harrisburg Patriot News)

Chicken and white bean chili

2 (20 oz) cans cannellini beans (sometimes known as white kidney beans)
1 tbsp olive oil
1 1/2 pounds chicken, diced into small cubes
1/4 cup chopped onion
1 14 oz can chicken broth
1 4 oz can green chiles, chopped
1 tsp garlic powder
1 tsp cumin
1/2 tsp oregano
1/2 tsp chopped cilantro
1/8 tsp cayenne
2 green onions, sliced
monterey jack cheese, shredded

Drain one can cannellini beans and set aside, but save the liquid.

Heat oil in pan over medium heat. Add chicken and onion and cook for 4 or 5 minutes. Stir in broth, green chiles, and spices. Simmer 15 minutes.

Stir in the drained beans and the can of undrained beans. Simmer 5 minutes (If you want, you can mash some beans to help thicken the chili.)**

Ladle into bowls, garnish with green onion and cheese

**Note: We also ended up adding some cornstarch to thicken the chili at the end.

Thanks, mom! I promise not to tease you about your cooking anymore...at least not for a while. :)

Monday, June 27, 2011

Light meal for a hot summer day


It is 114 degrees today in Arizona. 114 DEGREES!!! It's one of those days when you don't want to leave house, or even the couch. And the idea of firing up the oven, grill, or even microwave seems completely out of the question.

I suppose the plus side to these types of evenings is that they curb my appetite and actually make me crave cool, crisp veggies. So I turn to one of my favorite meals: the hummus platter.

Hummus is nothing new in our house...we've been dipping pita chips in it for years. But recently I've noticed restaurants serving a "kicked up" version of the standard "hummus & chips." They serve a nice dollop of hummus over top some greens, sprinkled with feta cheese, and accompanied by thin slices of tomato, cucumber, and warm triangles of pita bread. It's super-simple to replicate at home, and so I did. You simply slather the pita bread with some hummus & feta, and then top with cucumber and tomato, and some greens...sort of like a hummus pizza.

It is the perfect light meal or lunch on a hot summer days. And since there's many more of those hot days ahead for us, I have a feeling this will be gracing our table on a regular basis.

Tuesday, June 21, 2011

Shrimp and avocado tostadas & pulled pork tacos with fennel slaw


I have quite a few strengths as a cook, but timing is not one of them. I am at my best when I am making a dish that I can ease into, adjusting seasonings as I go, hovering and poking to test doneness. Or I enjoy things that I can make ahead and either serve cold, room temperature or reheated.

Meals that need to be carefully orchestrated, with several components being finished at exactly the same time, really stress me out. Take, for example, my husband's father's day request: surf and turf. There's nothing spectacularly difficult about this dish...no fancy ingredients or complex preparations. But the simple fact that I had to serve a perfectly cooked filet, perfectly cooked lobster tail, roasted potatoes, and broccoli, all steaming hot, ALL AT THE SAME TIME... Well, it gave me an anxiety attack. Yet, I managed to pull it off:


Anyway, the point of this post wasn't to brag about my surf and turf (although my husband did say it was delicious), it was to talk about the type of dish I prefer to make. The first is Shrimp and Avocado Tostadas. This dish makes a perfect appetizer, lunch, or light dinner. It's served cold or room temperature which means it's great to make ahead or to serve on a hot summer night. Here's how to make it:

Shrimp and Avocado Tostadas

Ingredients:

1 lb shrimp, cooked, peeled, deveined, and chopped
1 or 2 limes
1 or 2 ripe avocados, chopped
a few handfuls of grape tomatoes or small cherry tomatoes, halved
minced red onion
chopped cilantro
salt

Directions:

Once the shrimp have cooled, mix them in a bowl with the avocado and tomato. Squeeze in some lime juice. Add the onion, cilantro, and salt to taste. Mix together gently and serve atop crispy tortillas, or with tortilla chips. **If you want to make this a "make ahead" dish, wait to chop and add the avocado until just before you're ready to serve; otherwise it will turn brown.

The second dish I have to recommend is Melissa D'Arabian's "Pulled Pork Tacos with Fennel Slaw." This dish is definitely a bit labor-intensive, and has quite a few ingredients. But, it is a delicious recipe, and a perfect thing to make on a leisurely weekend afternoon. The pork cooks for three hours, so you can make it at lunch time, shred the pork in the late afternoon, and have it sitting on the stove ready to serve at dinner time and/or when your guests arrive. Click above for Melissa's recipe. I followed it pretty much exactly, except that I left out the sour cream and parmesan to make it dairy-free.

Sunday, June 5, 2011

Chopped brussels sprouts salad with bacon

In my quest to eat more veggies, I've come up with a simple but effective little trick: chop them up! I can enjoy eating almost anything if it is chopped up small enough and mixed with other tasty foods. So if I'm not a fan of a particular vegetable, or clueless about what to do with it, I start mincing away. Take brussels sprouts, for example. The thought of gnawing away on a big old sprout kind of makes me want to throw up. But when they are chopped up, seasoned with some lemon juice, parmesan cheese and bacon, and thrown into a salad: Deliciousness! (A while back, I posted another great chopped brussels sprouts recipe, which is a great warm alternative to this one.)

I got the inspiration for this salad from The Arrogant Butcher, a restaurant in downtown Phoenix. My friend ordered their brussels sprouts salad, and I helped myself to several forkfuls (yes, I'm rude like that). We both were surprised by how yummy it was, and I kept thinking about it for days afterward. I remembered the main flavors, and so I experimented with making one of my own. I have to admit that while my salad recipe is an original creation, the dressing is not. The one I repeatedly turn to is Lucini's "Bold Parmesan and Garlic," but I'm sure any slightly creamy, garlicky, parmesan cheesy dressing would do.

Chopped Brussels Sprouts Salad with Bacon

Ingredients:

Brussels sprouts, chopped (I use about 3-4 per person)
Bacon (I use about 1 strip per person)
Lemon
Parmesan cheese (the kind you grate yourself is the best, but any old kind will work)
Olive oil
Salt
Baby spinach, chopped
Romaine hearts, chopped
Good dressing (see photo)

Directions:

Cook the bacon until crisp (I just use the microwave method). Let cool and crumble.

Heat some olive oil in a pan and lightly saute the chopped brussels sprouts until they're slightly tender, but not super soft (you want them to still have some crunch). Squeeze in some fresh lemon juice, and add some salt and a few sprinkles of parmesan cheese.

Take the brussels sprouts off the heat and let them cool. Then toss them together with the bacon, spinach and romaine. Add dressing and top off with some more parmesan if you wish.

Friday, May 27, 2011

Lame blog post, awesome recipe

I'm in between vacations, so I don't have time to write a proper blog post. But I did want to take a few minutes to share this awesome recipe I made last night, which I stole from another blogger, who stole it from Food & Wine Magazine.

The recipe is for chicken breasts marinated in a yummy mustard sauce and then coated with crushed hard pretzels (I used Snyders). Everyone, including the kids, gobbled it up so it is definitely something I will make again and again!

You can find the blog post here and the recipe here.

Wednesday, May 4, 2011

Warm goat cheese salad (aka: an easy way to make a regular salad look & taste fancy)


I've been having some fun with salads lately. Two of my latest inventions, which I will be posting soon, include a chopped brussels sprouts, spinach, and bacon salad, and a smoked salmon and corn nut salad (I know you'll be on the edge of your seat waiting for that one).

There are just so many interesting combinations of ingredients that can go into a salad, and yet we  continue to eat the same old tried and true bland salads: lettuce, tomato, carrot, cucumber, croutons, balsamiccccccca8979wjrl;l...

Sorry, I just fell asleep on the keyboard because that salad makes me so bored.

This little trick I learned from Ina Garten is super-easy, but in a matter of minutes it turns a boring old "greens and vinaigrette" salad into a decadent gourmet treat. You simply pan fry a little disc of goat cheese and slap it on top. That's it! Unless you hate goat cheese, I promise this will turn your salad from the "Let's get it over with" course to the "Can I have seconds, please?" course.

Here's how to do it in a simple 4-step process:

Step 1: Toss some baby greens of your choice with a tangy vinaigrette of your choice. I prefer this homemade version: Whisk together some champagne vinaigrette, a few squeezes of lemon juice, salt, a dollop of good dijon mustard, and EVOO. Place the dressed greens on individual salad plates so that they will be ready for the addition of the goat cheese.

Step 2: Take a log of goat cheese and slice it into rounds using a piece of string or unflavored dental floss (In the interest of full disclosure, I actually used minty dental floss to do this once and I promise it didn't make the goat cheese taste minty).

Step 3: Fill one shallow dish with some egg whites, and another shallow dish with some panko bread crumbs. Heat a thin layer of olive oil in a saute pan. Dip both sides of each goat cheese round into the egg, then the panko, then pan fry until the breadcrumbs are golden brown and crisp. Using a spatula, plop the goat cheese rounds directly onto the salad.

Step 4: Eat!

Saturday, April 30, 2011

Spring has sprung! Smoked salmon bruschetta


I seem to be incapable of finding the right cooking vs. blogging balance. When I'm cooking a lot I can't find the time to write about what I'm cooking, and when I do have the time to blog it usually means I'm eating frozen pizza (just kidding...sort of).

Anyway, our April house guests, combined with the warm weather, brought out the inner healthy chef in me. I've made a bunch of great new dishes which I will be sharing in the coming weeks. (And to the people who faithfully read my blog--all three of you--I promise to post more often so that you can continue to be inspired by the delicious concoctions I create).

The first is a recipe I found in my trusty Food Network magazine, which caught my eye because 1) it's pretty to look at, 2) it's easy to make ahead, and 3) it works as either an appetizer or a light lunch. It's also delicious! The actual name of the recipe is "Smoked Salmon Rillettes with Tomato Salad," but I didn't know what in the heck a "rillette" was so I called it bruschetta. (OK, so I just looked it up and "rillette" is similar to a pate, which I like to eloquently describe as "mashed up meat mixed with other stuff." Actually, when you look at this recipe you'll see my description is pretty dead on. If all else fails, I might apply for a writing job with the Oxford Dictionary!)


Smoked Salmon Rillettes with Tomato Salad (courtesy of foodnetwork.com)
(otherwise known as Smoked Salmon Bruschetta)


Ingredients


For the salmon:

1 shallot, minced
2 tablespoons extra-virgin olive oil
1/2 pound salmon fillet, skin removed, cut into 4 pieces
Kosher salt and freshly ground pepper
2 tablespoons dry white wine
1/4 pound smoked salmon
1 stick unsalted butter, cut into pieces and softened ***I used mayo to make it dairy-free
1 tablespoon fresh lemon juice
1/4 teaspoon freshly grated nutmeg

For the salad:

1 pound grape tomatoes, halved
1/4 teaspoon sugar
Kosher salt
1 tablespoon red wine vinegar
1 tablespoon dijon mustard
1/4 cup extra-virgin olive oil
1/4 cup heavy cream ***I left the cream out to make it dairy-free
2 tablespoons chopped fresh tarragon
1 tablespoon chopped fresh chives
Freshly ground pepper
Sliced crusty bread, for serving ***I drizzled the bread with EVOO and toasted under the broiler before topping with the salmon spread & tomatoes

Directions:

Prepare the salmon: Cook the shallot with the olive oil in a skillet over medium heat, 2 to 3 minutes. Season the salmon with salt and pepper; add to the skillet. Add the wine, cover and cook over low heat until opaque, 3 to 4 minutes per side. Transfer the salmon to a plate and let the pan juices simmer, 2 minutes. Let cool.

Pulse the smoked salmon and butter in a food processor to make a coarse paste. Flake in the cooked salmon; add the pan juices, lemon juice, nutmeg and 1/4 teaspoon salt. Pulse until incorporated. Spoon into a bowl, cover and chill at least 1 hour.

Make the salad: Toss the tomatoes, sugar and a pinch of salt in a bowl. In a separate bowl, whisk the vinegar, mustard and 1/2 teaspoon salt, then whisk in the olive oil. Whisk in the cream, tarragon and chives. Toss in the tomatoes and season with salt and pepper. Serve with the salmon rillettes and bread.


Friday, April 8, 2011

Penne with peppers, pesto & sausage

There are so many evenings when I find myself staring helplessly into the refrigerator at 5:00 pm, wondering if it's possible to concoct anything remotely healthy, tasty, and quick out of what's in there. Sometimes I give up, shut the door, and pray there's something in the freezer. Other times, inspiration hits and I come up with a way to transform some odds and ends...a leftover bell pepper that's starting to get wrinkly...some chicken basil sausage from the local butcher...into a meal that seems like it was well thought out and carefully planned.

That happened the other night with this dish. It's nothing fancy or super original, but it was tasty, full of veggies, and quick and easy to prepare. Best of all, it only required six ingredients.

Penne with Peppers, Pesto & Sausage

Ingredients:

extra-virgin olive oil
2 bell peppers (any combo of red, yellow and/or green works), seeded and thinly sliced
1/2 onion, thinly sliced
approx 1/2 lb of Italian-flavored sausage (I prefer chicken sausage since it's less greasy)
pesto (store bought or homemade)
penne pasta (or any other pasta of your liking)

Directions:

In a large skillet, saute the sliced onion and peppers in olive oil over medium-low heat for several minutes until tender. In the meantime, boil the water for the penne pasta. After the veggies are tender, remove the casing from the sausage and crumble the sausage into a pan; cook until no longer pink. When the pasta is done cooking, toss it with the pepper/sausage mixture. Add several healthy dollops of pesto and stir.

Monday, March 28, 2011

Roasted beet chopped salad with citrus vinaigrette

Up until a few years ago, I had a serious aversion to beets. If anyone even asked me to try one, I would scrunch up my nose like a whiny little kid and yell "Ewwwwww...gross!"

Then everything changed. My husband and I were at an elegant restaurant, celebrating a birthday, and I couldn't help but notice a gorgeous concoction being delivered to the table next to us. "What is that?" I asked the waiter as he passed by. "It's our roasted beet salad," he replied. "It's one of our best dishes."

"Beets? Yuck!" screamed the voice inside my head. But then the rational adult voice stepped in, reasoning that if I was ever going to learn to like beets, this would be my chance. I ordered it.

When it arrived at the table, I spent a few minutes admiring it before I dug in. It was so artfully arranged: a perfectly round bed of goat cheese, topped with thin slivers of beets, standing on end and wrapped around each other to look almost like a tulip with a hollowed out middle. In the middle was some frisee lettuce dressed with a tangy orange vinaigrette. All three components of the dish complemented each other perfectly. The sweetness of the beets (which is what I don't like) was tamed by the tartness of the dressing and the sour tanginess of the goat cheese. I know I ordered some sort of expensive entree that night, too, but all I remember about the restaurant was that beet salad.

I've yet to replicate the exact salad I had that night, but I've come up with a similar, easier version. Aside from the flavors and the health benefits, the great thing about this dish is that it's beautiful to look at. As they always say, "We eat with our eyes first."

Ingredients:

2-3 roasted red beets* diced into small cubes
1 cucumber, diced into small cubes
2 handfuls of greens, chopped (I used spring mix lettuce, but you could experiment with almost any type of green)
crumbled goat cheese
shelled, chopped pistachios (if you want extra crunch, toast the pistachios in a dry pan before adding them to the salad)
Citrus vinaigrette (below)

*To roast the beets, wrap them in aluminum foil and roast in the oven at 375 degrees until tender (usually takes about an hour). Peel them after they've been roasted.

For the vinaigrette: Combine several splashes of champagne vinegar and orange juice in a bowl. Add salt, a few squeezes of fresh lemon juice, and a dollop of dijon mustard. Whisk in some olive oil until it forms a nice consistency. Adjust ingredients/seasonings to taste. You want it to have some bite, but not be overly vinegary.

Combine all of the salad ingredients in a bowl, except the pistachios. Add just enough vinaigrette to lightly coat. To serve fancy restaurant style: fill a small cup or glass with several scoops of salad, place a plate on top, and overturn. Lift up the cup and...voila! Sprinkle the chopped pistachios on top.

Tuesday, March 22, 2011

A Laos-y Feast: chicken baguette sandwiches with hot chile-garlic sauce, and turkey lemongrass lettuce wraps


When I lived in Los Angeles I had a ritual of ordering Thai yellow curry and Tom Yum soup every Sunday exactly at 5:00, when the Thai place down the street opened its doors. Even though that was years ago, I still find myself craving spicy Asian cuisine on Sunday afternoons.

This past Sunday, I decided to get exotic after reading an article in February's Food and Wine Magazine about the cuisine of Laos. I don't know much about Laos, but since it's wedged in between Thailand, Vietnam, and China, I figured the food there must be good. Almost all of the dishes in the article used a combination of some of my favorite ingredients, including lemongrass, cilantro, chiles, shallots, fresh lime juice, and garlic. The photos of the food and scenery were equally gorgeous, and while my weed-filled backyard doesn't quite compare to the plateaus, floodplains and thatched homes in Laos, I figured I could at least attempt to replicate some of the foods in the article.

Despite what the title may connote (I'm just a sucker for bad puns), this was actually a delicious meal. The first recipe I made was called "Ground Turkey Laap," which is a Laos-y name for lettuce wraps. These differ from the type of lettuce wraps you'd find at a Chinese restaurant (or the Cheesecake Factory for that matter) in that the sauce is herbal and fresh-tasting instead of covered in a sweet soy glaze. The laap was pretty simple to make, except for tracking down lemongrass. Usually it will be in the same area as the herbs, but not all grocery stores carry it. Even Whole Foods only had a few stalks which were shoved in an unlabeled bin.

Using lemongrass was an exciting experiment for me because I've never used it before, and it scared me a little. Turns out lemongrass isn't scary at all. If you want to use it to flavor soups or curries, you can chop up the stalk and let it simmer in the broth--just make sure you remove it before eating. The other way to use lemongrass is to peel the tough outer leaves until you find the tender white core in the middle (about the same diameter as a thin straw). Then you can finely chop or puree that core and mix it into just about anything.

Here is the recipe for Ground Turkey Laap (courtesy of Food and Wine). It makes a great appetizer or a light lunch; it's easy to store and reheat later too.

Ingredients:

1 tbsp long-grain white rice
1 tbsp vegetable oil
1 lb ground turkey
1/4 cup plus 2 tbsp chicken stock
1 tbsp plus 1 tsp Asian fish sauce
salt & pepper
1 tbsp fresh lime juice
2 large stalks of lemongrass--tender inner core only, minced
2 scallions, thinly sliced
1 medium shallot, thinly sliced and separated into rings
1/2 cup chopped cilantro
1/2 cup chopped mint
1/4 tsp crushed red pepper
small romaine or Belgian endive leaves, for serving

Directions:

In a small skillet, toast the rice over high heat, shaking the skillet a few times, until the rice is golden brown. Transfer to a spice grinder (or coffee grinder) and let cool completely. Grind the rice into a fine powder.

In a large skillet, heat the oil and cook the turkey over medium heat, breaking up the meat evenly, until no pink remains. Add the stock and cook, stirring, until bubbling. Remove from heat and stir in fish sauce. Season with salt and pepper and stir in the lime juice. Let stand for 5 minutes, then stir in the lemongrass, scallions, shallots, cilantro, mint, crushed red pepper, and rice powder.

Arrange the lettuce leaves on a platter, and spoon the turkey mixture on top.

Lao-Style Chicken Baguette Sandwiches  (courtesy of Food and Wine Magazine)

While my husband and his friend lapped up the laap (see - I can't help myself!), I got to work on the main course: the baguette sandwiches. Food and Wine named this dish "Lao-Style Chicken Baguette Sandwiches with Watercress," but unfortunately I wasn't able to find any watercress. I just used plain old green leaf lettuce, which worked perfectly fine.

At first glance this looks like any old chicken sandwich: sliced chicken breast, tomato, carrot, mayo and lettuce on a baguette...the key ingredient that makes it Laos-y is the chile-garlic sauce. I have to admit, I was tempted to just buy the jar of chile-garlic sauce I saw at the store when I was hunting down the ingredients for my recipe. But I decided to take on the challenge of making an Asian condiment on my own. I'm really glad I did--the sauce was definitely a little labor intensive, but the flavors were well worth the work.

Chile-Garlic Sauce

1/4 cup plus 3 tbsp vegetable oil
1 large shallot, thinly sliced and separated into rings
3 large garlic cloves, coarsely chopped
2 1/2 tbsp minced fresh ginger
1/4 cup Korean coarse red pepper powder*
2 tablespoons sugar
1 1/2 tbsp Asian fish sauce

*I couldn't find Korean coarse red pepper powder at the store, so I found the closest thing to it: some sort of Indonesian chile powder. If you live near an Asian grocery store, you could probably find the Korean stuff there. But my substitute seemed to work perfectly fine so you can also experiment with any other type of powdered chiles or red peppers.


In a small skillet, heat 1/4 cup, plus 2 tbsp of oil. Add the shallot rings and cook over moderate heat, stirring a few times, until golden brown and crisp. With a slotted spoon, transfer shallot rings to a bowl. Add the garlic to the oil, and cook over moderately low heat until golden. Transfer the garlic to the bowl. Add the ginger to the skillet and cook until fragrant, about 2 minute. Add red pepper powder and sugar and cook, stirring for 30 seconds. Scrape the sauce into the bowl. Stir in the fish sauce and the remaining tbsp of oil.

To make the sandwiches:

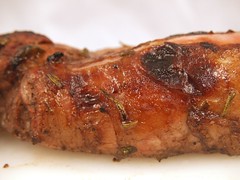
Season chicken breasts with salt and pepper, and saute in some oil until no longer pink inside. Let rest on a cutting board for a few minutes; then slice crosswise into 1/4 inch strips.

Spread the chile-garlic sauce on both halves of a sliced baguette. (How much you slather on will depend on your tolerance for spice). Then spread mayo on top of the chile-garlic sauce. Add a layer of chicken, thinly sliced tomato, lettuce, and shredded carrot, and close the sandwich. Enjoy!

Make sure you use the best, freshest baguette you can find...as my husband loves to say: A sandwich is only as good as the quality of the bread.

Wednesday, March 16, 2011

Family dinner success: herb-crusted chicken cutlets

One of the only times I really lament having to make dairy-free family dinners is when I think about chicken parmesan. There's just something so delicious and soul-satisfying about that dish...especially when it's homemade. I've done dairy-free spaghetti and meatballs, even dairy-free pesto, but I thought it would be impossible to attempt chicken parmesan without the parmesan.

Then I stumbled across this recipe from Rachel Ray. I immediately printed it out and ran to the grocery store. It was one of those recipes that I knew would be a crowd pleaser, and it was indeed. The trick that makes the chicken extra tasty is that you make your own breadcrumbs out of a toasted baguette. It definitely makes the dish worlds better than it would have been with boxed breadcrumbs.

I didn't read the recipe thoroughly, and accidentally processed the bread in the food processor before toasting it. But when I figured out my mistake I just went ahead and stuck the breadcrumbs in a pan and toasted them that way, stirring them a few times until they were evenly browned. Personally I think this is a case of a "mistake gone right" because it meant that all of the bread was evenly toasted and extra-crunchy.

Here is my version of Rachel's recipe, with a few minor modifications, and a little more user-friendly (in my humble opinion)

Chicken Cutlets with Herbs (adapted from Rachel Ray)

Ingredients:

1/2 loaf of baguette bread (day old is fine)
4 chicken breasts, cut in half crosswise if they are thick, pounded until 1/4 inch thick
salt and freshly ground pepper
all-purpose flour, for dredging
1 large egg
several sprigs fresh thyme, leaves finely chopped
2 to 3 sprigs fresh rosemary, leaves finely chopped
handful of fresh chives, finely chopped
1 1/2 tsp poultry seasoning
olive oil, for sauteing cutlets

Directions:

Heat the oven to 400 degrees. Tear baguette into pieces and put in a food processor. Pulse until ground into breadcrumbs. Place the breadcrumbs on a shallow pan/cookie sheet. Toast in the oven until deep golden brown. When they are toasted, pour into a shallow dish and add the herbs, poultry seasoning, and some salt (how much salt you use should depend on whether or not your poultry seasoning contains salt).

Put flour into a shallow dish. In a separate shallow dish, beat the egg with a little water. Create an "assembly line" of dishes next to the stove: flour, egg, then seasoned breadcrumbs.

Heat a thin layer of olive oil in a large skillet over medium-high heat. Season the chicken on both sides with salt and pepper. Dredge the chicken in the flour, then coat in egg, then coat in breadcrumbs. Saute in the pan until golden and cooked through, 3-4 minutes on each side. You may need to add more oil when you flip the chicken...don't be stingy with the oil, as that's what will give the chicken a nice golden crust.

I served the chicken alongside a simple salad of red lettuce, cucumbers, tomato and avocado. It would be equally good served over pasta. The other nice thing about this recipe is that it's a great way to use up a day-old baguette and whatever herbs you happen to have on hand or in your garden. The rosemary was key (and I loooove rosemary), but I'm sure the thyme and chives could be swapped with something else without changing the flavor too dramatically.

This definitely will be made time and time again in my house.

Sunday, February 27, 2011

Fun with pizza dough

Lately I haven't been feeling very creative when it comes to cooking. The theme of our nightly dinners has been "same old, same old." I think it's because winter produce leaves me a little cold...get it? :)

In order to put some fire back in the kitchen, I decided to have a "make your own pizza" party...something fun for the kids and grown-ups too. Nowadays it's easy to find fresh refrigerated pizza dough at almost any store, and it's a great way to use up leftovers.

The girlies topped their pizzas with the usual: pepperoni, sliced peppers, and pesto. But I decided to get a little fancy for the adult pizza. After scavenging through the fridge, I went with a combination of sliced red onion, smoked salmon, capers, goat cheese, and a hearty drizzle of olive oil. When it came out of the oven, I drizzled it with a little more olive oil, and added a few dollops of sour cream and some chopped arugula. It was really good, and the greens eliminated the need for the obligatory salad we usually eat with our pizza.

Tuesday, February 15, 2011

Second-best stromboli


Hopefully my husband will never end up on death row, but if he does become an ax murderer, at least he won't have to waste any time deliberating about his last meal. He has already decided that it will be stromboli from Your Place (known as "YP" among the locals) in Hershey, PA.

Since we live thousands of miles from YP, I've done my best to replicate his favorite stromboli at home. My husband does love my stromboli, but I've come to accept it will never be quite as good as the YP version--primarily because I've failed to achieve the perfect crispy, yet chewy dough texture. It would probably help if I had a wood-fired oven in my house.

So here is my own take on stromboli. I call it "second best stromboli" since that's basically what it is:

Ingredients:

1 lb pizza dough (I've tried pre-made from a store, frozen, refrigerated, good old Pillsbury, and homemade...they all turn out about the same)
approx 1/2 lb sliced ham
approx 1/2 lb sliced salami
approx 1/2 lb sliced provolone
fresh basil
1 egg, beaten
mustard (I prefer Dijonnaise)
tomato sauce or pizza sauce (for dipping - optional)

Preheat oven to 375. On a slightly floured surface, roll out dough into about a 16 x 10 rectangle. Spread a thin layer of mustard on the dough and top with basil leaves. Then add one layer each of the ham, salami, and provolone, leaving a one-inch border on the edges. Spread the mustard and basil on top of the provolone, and add another layer of meats and cheeses.

Fold the sides of the dough into the center and pinch the dough to seal. Pinch the ends of the dough and fold under. Brush the stromboli with the beaten egg, and cut about 5 shallow slits crosswise on the top of the dough (this is an important step - I once forgot to "vent" the stromboli, and it made the inside steam and turned the dough to mush).

Gently move the stromboli to a lightly greased baking sheet. Bake for 25 minutes, or until the top is golden brown.

Serve with pizza sauce on the side for dipping.

Sunday, January 23, 2011

Welcome home brunch: Grilled cheese & tomato soup eggs benedict with rosemary hash browns


My husband just returned from a week-long trip, which felt more like a month-long trip. Before I had kids, I didn't mind his work-related travels. Of course I missed him, but I made the most of his absence by catching up on girly movies he'd never watch in a million years, reading books, going shopping with girlfriends, and letting out my inner slob. Now that I have kids, those work trips are brutal. Aside from the fact that I miss having my husband around, I miss having some relief from all the girls' fights, potty trips, endless requests for food/drink/stories/etc. And the girls are tired of me, I'm sure.

Needless to say, we were all really happy to have daddy back home today. To welcome him home, I decided to make a dish I've been pondering for months. I first came up with this idea over the summer, but I never got around to trying it out. Today seemed like the perfect occasion.

The idea was this: to put a twist on eggs benedict by making a version that incorporates everyone's favorite lunch: grilled cheese and tomato soup.

I had a gut feeling it would turn out really yummy, and luckily I was right. The nice thing about this version is that it eliminates the need for hollandaise sauce, which saves some calories and labor as well. And it only involves five main ingredients. Here's what you need:

Grilled cheese & tomato soup eggs benedict

English muffins (go for the plain old white or sourdough kind)
sharp cheddar cheese, sliced
eggs
canadian bacon
creamy tomato soup (I used my favorite standby: Pacific Foods Roasted Red Pepper and Tomato Soup)
chopped italian parsley for garnish (optional)

Heat 3 inches of water in a pot or deep skillet to prepare for poaching the eggs (If you haven't poached eggs before I recommend doing some googling to find out how).

Pour the soup into a saucepan and heat until warm.

Saute the canadian bacon in a skillet until heated through and slightly browned. Turn to low to keep warm.

Turn the broiler to high. Toast the english muffins in the toaster, then place on a cookie sheet and put the sliced cheddar on top. Place under the broiler until the cheese melts and starts to bubble.

Once the egg water is at the right temp (hot, but not quite boiling), poach the eggs for 3 minutes.

Place the cheesy english muffins on a plate. Top each one with a slice of canadian bacon, then a poached egg. Ladle some of the tomato soup over the top of the eggs, and sprinkle with parsley to garnish.

Rosemary hash browns

No breakfast or brunch feels complete to me without some sort of potato dish on the side. So I whipped up these quick rosemary potato hash browns. Just saute some chopped onion in a pan for about five minutes, then add diced potato and finely diced rosemary. Saute until the potatoes are tender, stirring frequently and scraping up the browned bits from the bottom of the pan. Add salt and pepper to taste.

Wednesday, January 12, 2011

Chicken and rice with spicy tomatillo and Mexican squash sauce (and homemade guacamole)

I always get excited when something I cook turns out well, but I get particularly giddy when it's something I invented myself. It's been a while since I got experimental in the kitchen, so the other night I decided to get a little crazy with my newest batch of veggies from Bountiful Baskets.

My basket contained a mystery ingredient I'd never cooked with before. It was gray squash (also known as Mexican squash). Through a Google search, I learned that it's kind of like zucchini, but tastes better and doesn't get quite as mushy when cooked. That sounded promising.

Since it was nicknamed Mexican squash, I figured I'd use it in a Mexican-inspired meal. I had a bunch of tomatillos, some jalapenos, tomatoes, and onions, so I decided to do some chopping, roasting and pureeing to create a tangy, spicy sauce to serve over chicken and rice. It also gave me a chance to work on my new chopping techniques courtesy of the Knife Skills class I took at Sur la Table (highly recommended, by the way).

Feeling extra creative, I decided to make my own Mexican rice instead of using the boxed pre-seasoned stuff. And I also made some fresh guacamole with the avocados in my basket.

Chicken and sauce:

canola or olive oil
8 tomatillos
1-3 jalapenos (taste them to see how spicy they are before deciding how many to use)
1 small onion, chopped
2 gray/Mexican squash, chopped into smallish cubes
1 or 2 garlic cloves, chopped
2 large tomatoes, diced (or substitute canned tomato)
about 1 cup of chicken broth
salt
tomato paste
a handful of chopped cilantro
Chicken breasts, pounded thin

Peel the papery skin off of the tomatillos, and rinse them. Roast the tomatillos and jalapenos under the broiler until the skin starts to blister and turn black; flip over so both sides are roasted. Puree the roasted tomatillos and jalapenos in a blender or food processor until fairly smooth. Set aside.

Saute the diced onions, garlic and squash in some oil for several minutes, until tender. Transfer to a large sauce pan/soup pot. Add the tomatillo and jalapeno mixture to the pot. Pour in the chicken broth and add the tomatoes. Simmer for a few minutes, and add salt to taste. If it's too tangy, add some tomato paste to sweeten it a little bit. You can also add some more chicken broth if it's too thick. If it's too runny, let it simmer for a while until it reduces down.

While the sauce is simmering, heat some oil in a saute pan. Season both sides of the chicken breasts with salt and pepper. Saute, turning once, until no longer pink. Serve the chicken over the rice, and ladle the sauce on top. Guacamole can be served on the side, or mixed in with the dish.

Rice:

I followed this recipe, substituting cilantro for the parsley. I also used canned diced tomatoes instead of tomato sauce.

Guacamole:

If I have really pretty, perfectly ripe avocados, I keep the guacamole simple: mashed avocados, freshly squeezed lime juice, salt, chopped cilantro, and possibly some chopped tomatoes.

Tuesday, January 4, 2011

Herb-marinated pork tenderloin


December was a month filled with many fun things, but exciting, nutritious new recipes were not among those things. Due to the chaos of the holidays, a lot of convenient, no-frills meals were consumed at my house. Now that it's a new year, I'm eager to restock my fridge with fresh foods and get back into the kitchen.

My Christmas day meal was quite delish, but last night I made a pork tenderloin that I believe trumped my Christmas version, and was a lot less difficult. It was a completely last-minute meal--I had learned less than 24 hours earlier that my good friend Jessica would be coming into town for one night on a business trip, and I wanted to make us a great dinner. Without time to get to the store, I had to make due with what I had on hand.

Luckily, I had purchased a nice piece of pork tenderloin at Whole Foods on Sunday for no real reason other than that it looked pretty in the display case. But what to do with it? A quick search of pork tenderloin recipes on the Food Network website turned up a winner by Ina Garten (click here for the recipe). Not only was it rated 5 stars, but it used ingredients that I happened to have on hand. It helps that I have a lemon tree and a rosemary bush in my backyard!

I plucked six juicy, ripe lemons from the tree, pulled off a couple stems of rosemary, and got to work creating the marinade. I only had the chance to marinate the pork for a little over two hours instead of the recommended three, but it was so flavorful I can't imagine that an extra hour would have made a difference.

I served the pork alongside some corn (from the freezer), a spinach salad with pears and gorgonzola (the same one I made at Christmas, minus the pomegranate seeds), and some crusty whole wheat rolls (Alexia's frozen rolls, which are great to have on hand). The meat was super-moist, and SUPER-flavorful. I always find it so hard to make meats that are truly infused with flavor from the inside out, but this recipe was a home run.

I do think there were several contributing factors to why it was so good: 1) high quality meat, and 2) freshly picked and perfectly ripe lemons & rosemary). But I bet that even regular old pork chops and dried rosemary would taste great in this marinade. I'm sure I will be trying it out in several different incarnations over the years--especially since my girls even gobbled up this meat, and getting them to eat meat is one of my biggest challenges in life.

Now, to further inspire me in 2011, I am headed to a knife skills course at Sur La Table. Hopefully I won't maim anyone or chop off one of my fingers.